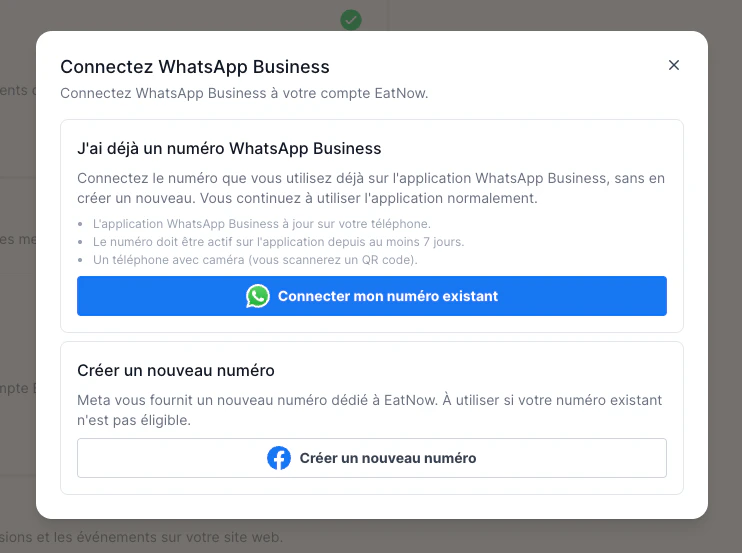
In EatNow, go to Settings → Integrations, find the WhatsApp card and click Connect.
2
Click “Create a new number”
It’s the bottom button, under “Create a new number”. A Meta window opens: log in with the Facebook account that manages your business.
Click “Create a new number”.
3
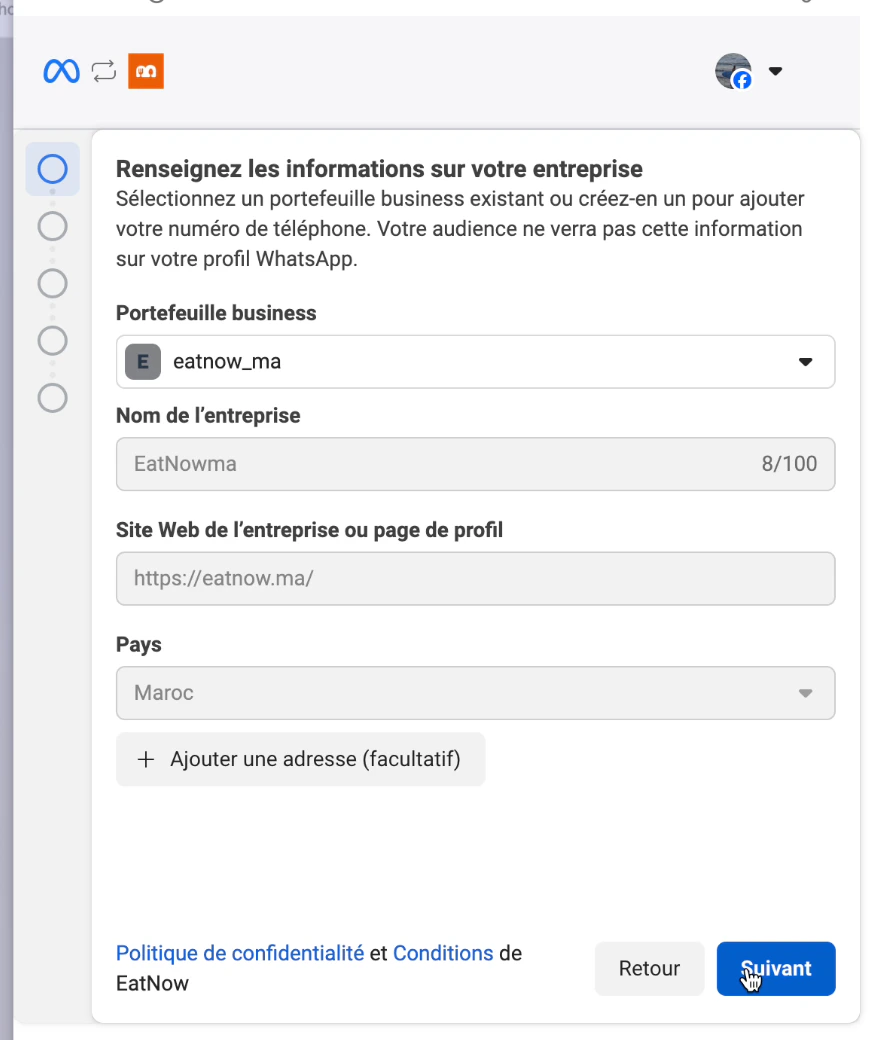
Choose your business
Choose your business portfolio from the list, or create one if there isn’t any.
Whenever a name is asked, type your restaurant’s name, spelled correctly: it’s what your customers will see.
Choose or create your business portfolio.
4
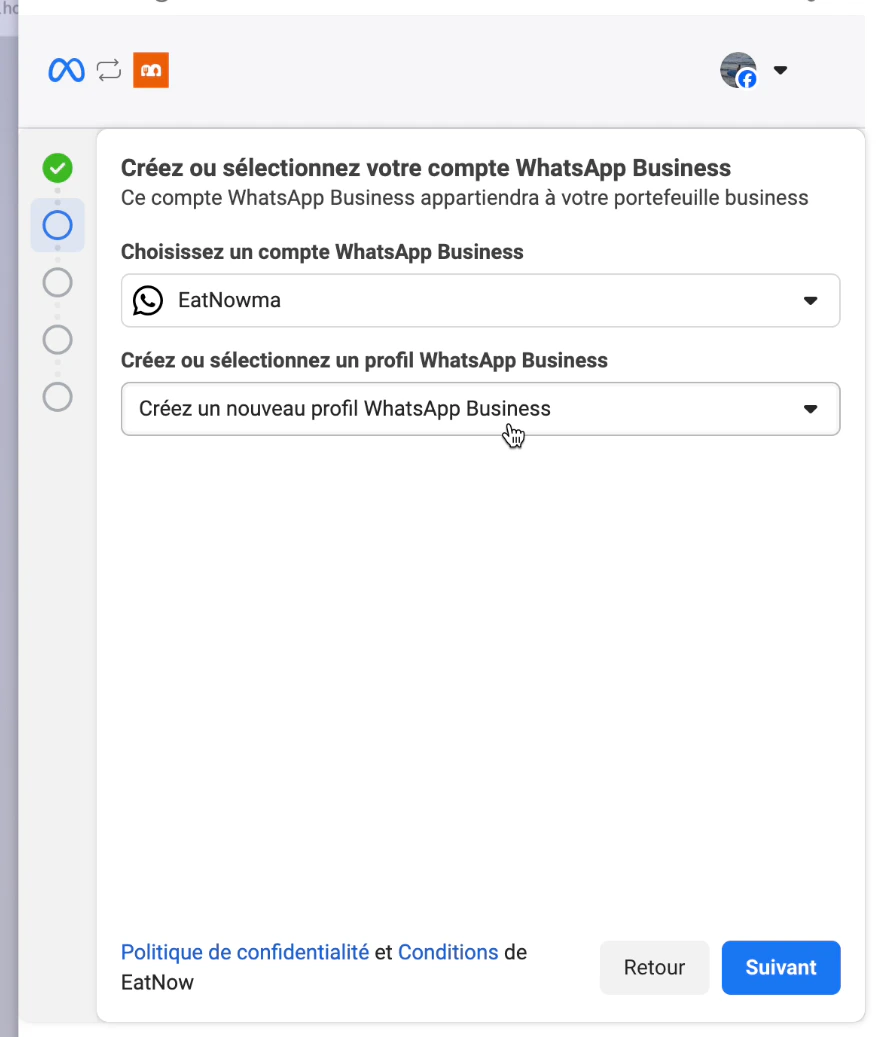
Create your WhatsApp Business profile
In “Create or select a WhatsApp Business profile”, choose Create a new WhatsApp Business profile, then click Next and fill in your restaurant’s information.
Create a new WhatsApp Business profile.
5
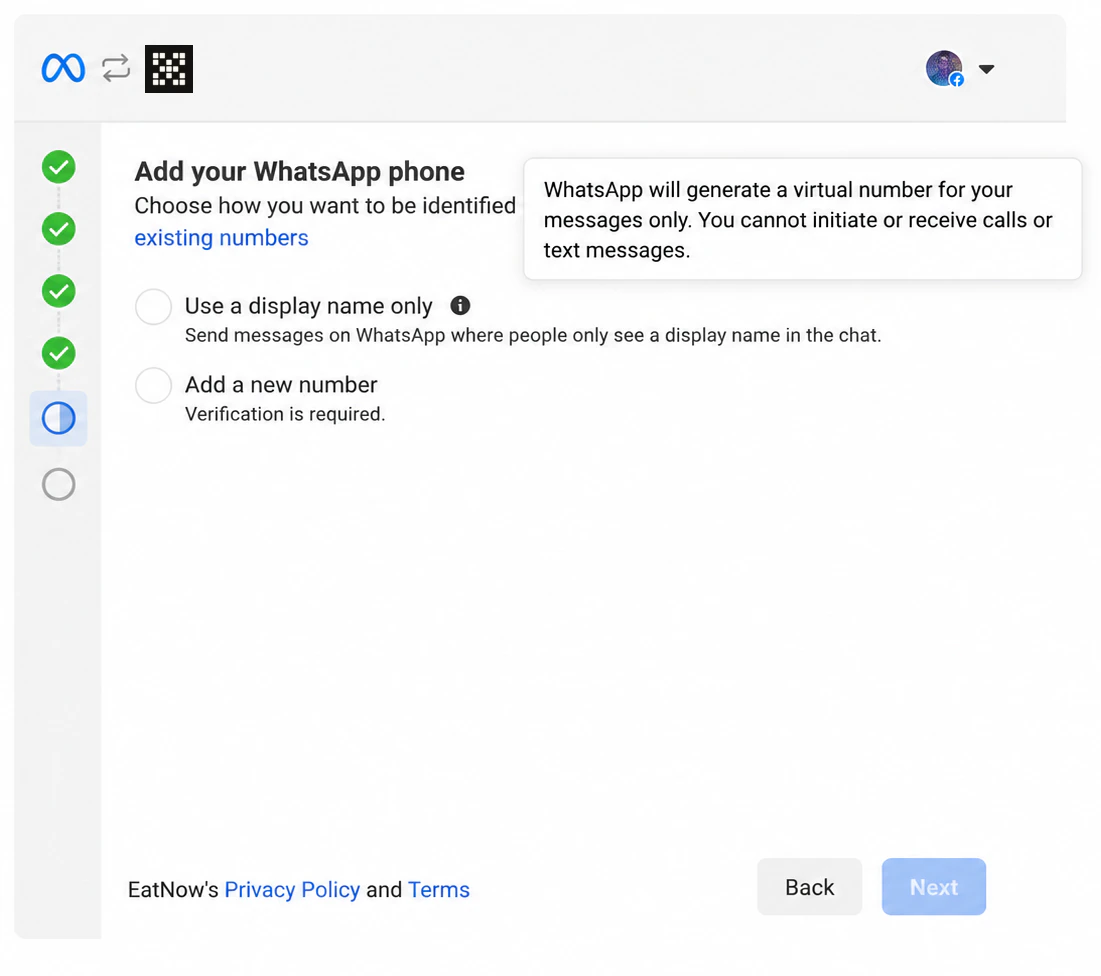
Choose “Add a new number”
On the “Add your WhatsApp phone” screen, tick “Add a new number”, then click Next.
Tick “Add a new number”.
6
Type the number and get the code
Choose the country, type the SIM card’s number, then choose how to get the code: text message or voice call. Type the 6-digit code you receive.No code? Wait a minute, then ask for it again by voice call.
7
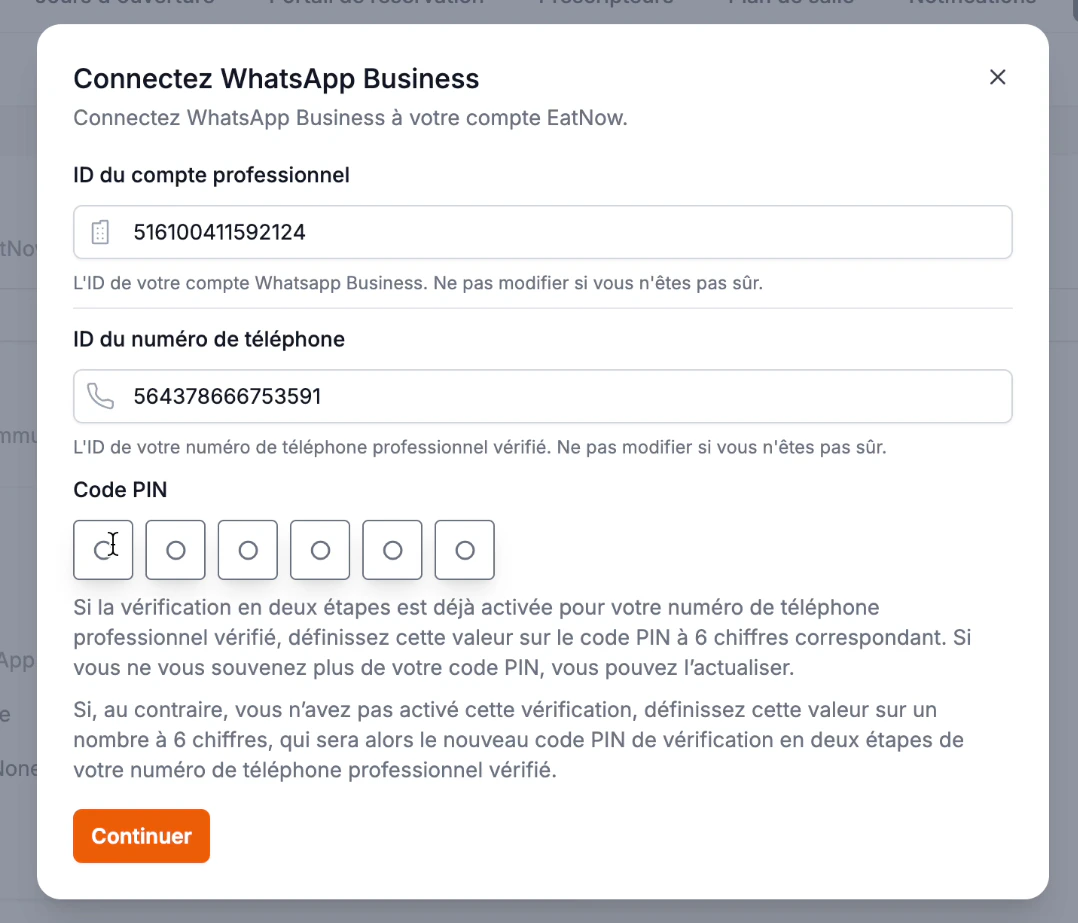
Choose your PIN code in EatNow
Back in EatNow, make up a 6-digit PIN code, type it, then click Continue. Don’t touch the two fields above it.
Write down this PIN code somewhere safe: you will be asked for it later (see Finish setup). It’s not the code you got by text message.
Finishing the setup can take a few minutes — don’t close the window and don’t reload the page.
Type your 6-digit PIN code.
Once connected, this number can no longer be used in a WhatsApp app on a phone: your WhatsApp conversations happen in EatNow. The SIM card keeps its normal calls and text messages.
Last step: finish setup
Bank card, display name, re-registering the number and notifications — the checklist so that automatic messages go out.