
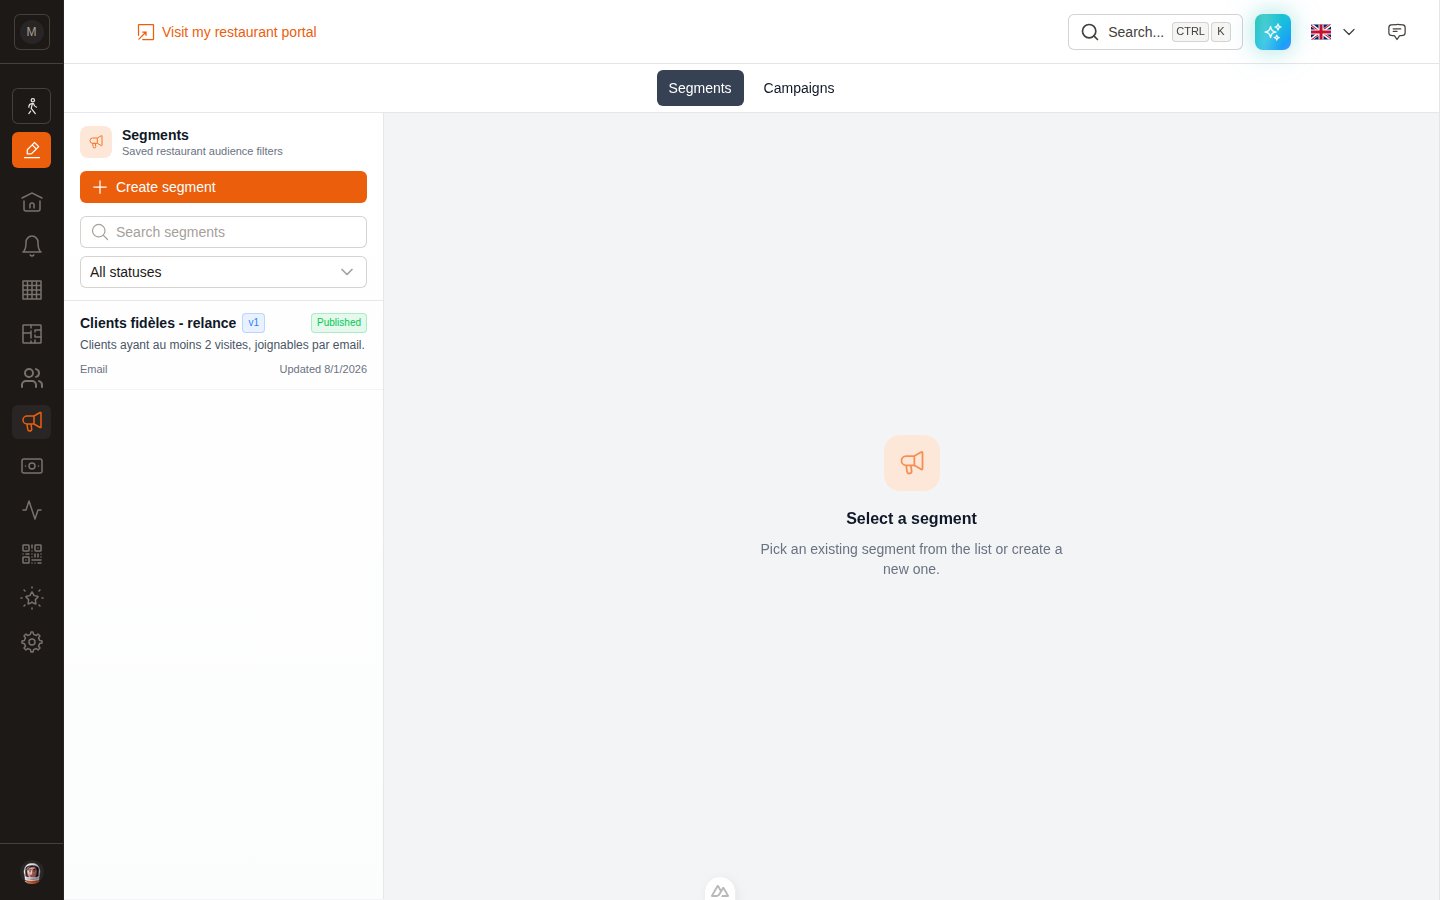
The Segments tab. The list on the left, the editor on the right.
Create a segment
1
Click Create segment
Top-left of the Segments list. The New segment editor opens.
2
Name it and pick a channel
In the Segment settings card, fill in Name (required) and, optionally, Description. Then choose the Channel:
3
Write the rules
In the Segment builder card, use the Manual Editor or the AI Editor — both are covered below.
4
Check the live preview
On the right, Live preview updates as you type: how many contacts match, and a sample of them with their email, phone, language and visit count. If it says 0, your rules are too narrow.
5
Save draft
The Save draft button appears as soon as you change something. A draft is saved but not usable by a campaign yet.
6
Publish
Click Publish. This creates version v1 (then v2, v3… on each republish). Campaigns can only select published segments.
The manual editor
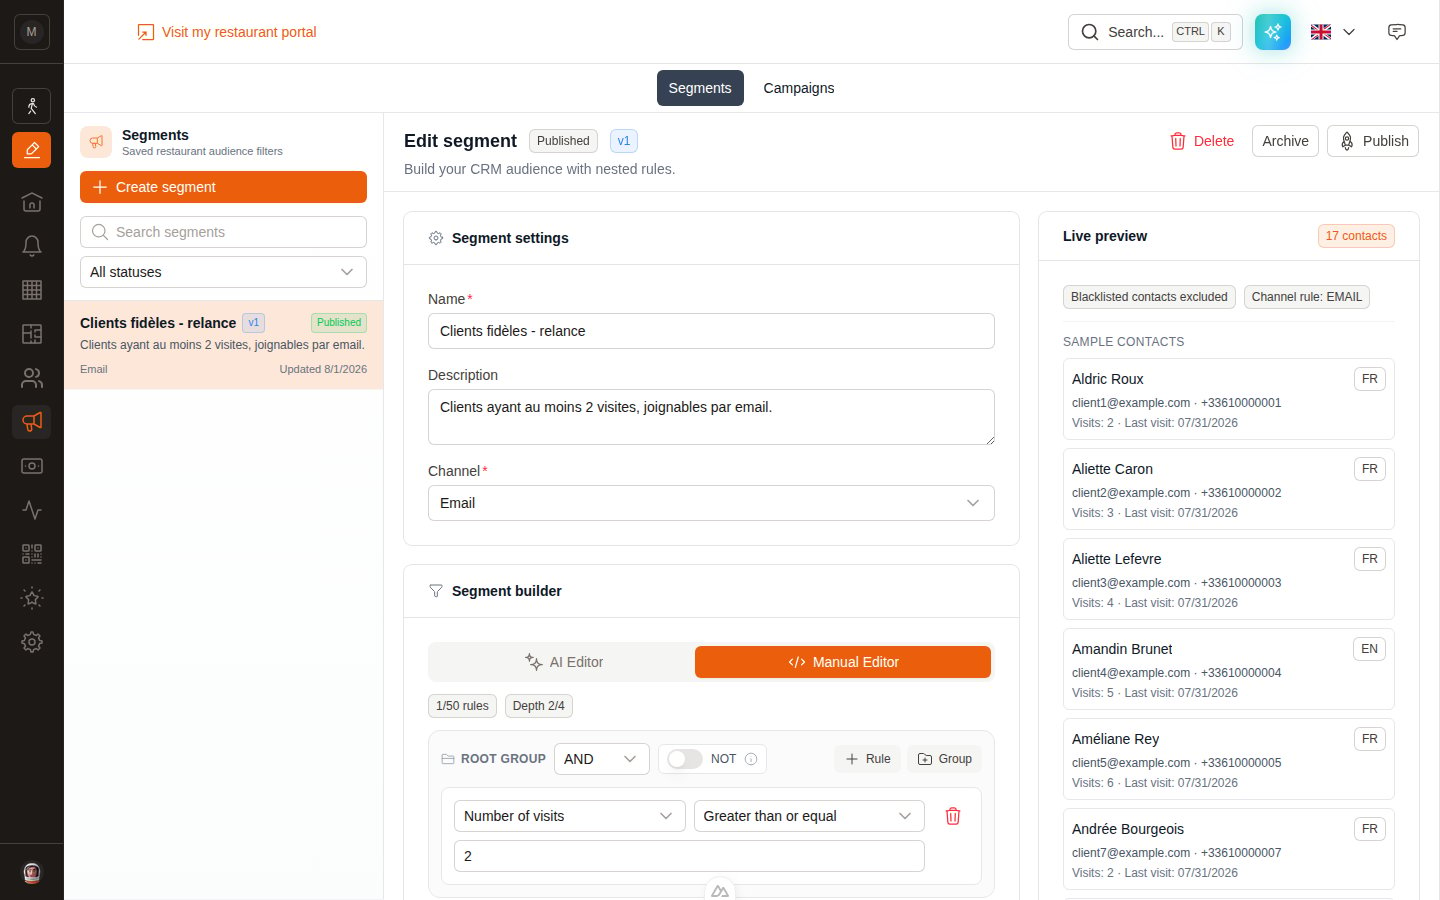
The manual rule builder, with the live preview on the right.
- A rule is one condition: field + operator + value. Example:
Number of visits—Greater than or equal—2. - A group joins its children with AND (all conditions must match) or OR (any one is enough).
- The NOT toggle inverts a whole group: it targets customers who do not match what’s inside.
- Use + Rule to add a condition to a group, + Group to nest a sub-group.
Limits: 50 rules maximum and a nesting depth of 4. The two grey badges above the builder (
1/50 rules, Depth 2/4) always show where you stand.A worked example
Target regulars who haven’t come back recently:The AI editor
Don’t want to assemble rules by hand? Open the AI Editor tab, describe your audience in plain language, and click Generate rules.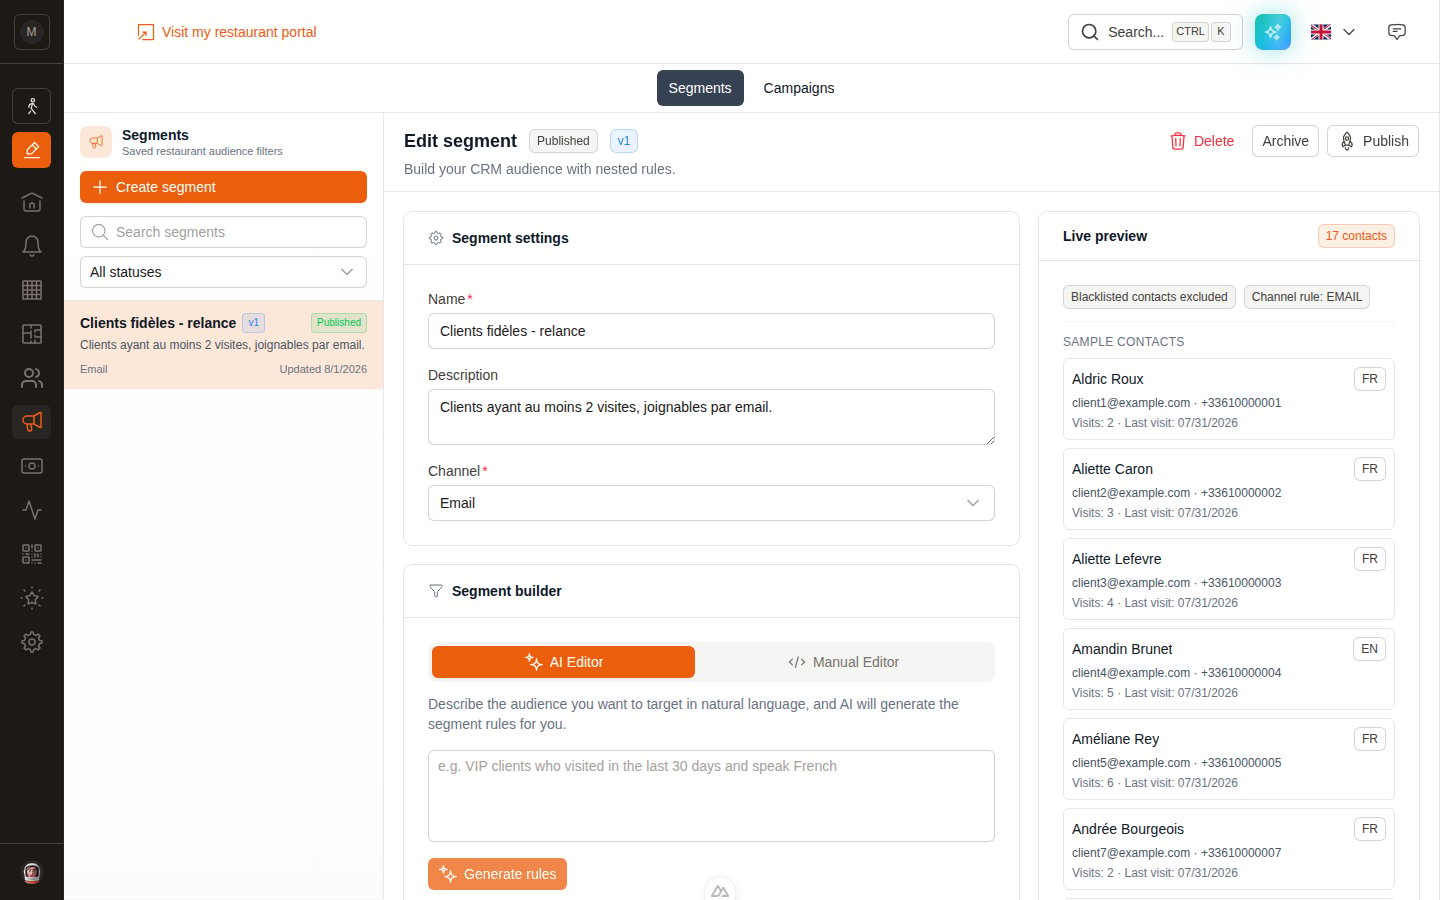
Describe the audience in your own words; the rules are written for you.
- “VIP clients who visited in the last 30 days and speak French”
- “Customers with more than 2 no-shows”
- “People who have never come but gave us their email”
- “Customers who spent more than 500 in total, tagged Birthday”
Available fields
Your own customer custom fields also appear in the list, below the standard ones, with their own name. If you’ve created a “Favourite table” or “Wine club” field, you can segment on it.
Available operators
Which operators you get depends on the field type.Two exclusions you never have to write
Whatever your rules say, EatNow always removes:- Blacklisted customers — the preview shows a
Blacklisted contacts excludedbadge to remind you. - Incomplete WhatsApp contacts (draft records that aren’t real customers yet).
Statuses and versions
Each Publish creates a new version. The Version history card at the bottom of the editor lists them with their date and channel.
Archive or delete
Both buttons sit at the top-right of the editor.- Archive keeps the segment and its history, but takes it out of circulation. Reversible in spirit: nothing is lost.
- Delete removes it permanently. Use it for mistakes and test segments only.
Next step
Prepare your template
Your segment is ready — now write the message.
Create a campaign
Put the segment and the template together and send.