Where can I export?
There are two places:| From | Best for |
|---|---|
| The Export button in any reservations view (List, Planning, Table) | Exporting exactly what you currently see on screen, with your filters applied |
| Settings → Integrations → Export | Exporting a whole period at once (by booking date range) |
Choosing a file format
Whenever you export, you pick a format:- Excel (XLSX) — a real spreadsheet. Best choice for most people: opens cleanly in Excel and Google Sheets, with accents and columns already formatted.
- CSV — a simple text file, handy if another tool asks for a CSV import.
Not sure which to pick? Choose Excel (XLSX).
What are export templates?
By default, an export includes every available column. That’s a lot — and you rarely need all of them. An export template lets you save a tidy, reusable selection: pick only the columns you care about, put them in the order you want, give it a name (e.g. Accounting, Evening service), and reuse it everywhere. You can create as many templates as you like. For example, an Accounting template might keep only Name, Date, Group size, Total paid — nothing else — so the file is clean and ready to send.Create an export template
Open the export settings
Go to Settings → Integrations → Export. At the top you’ll find the Reservation export templates section.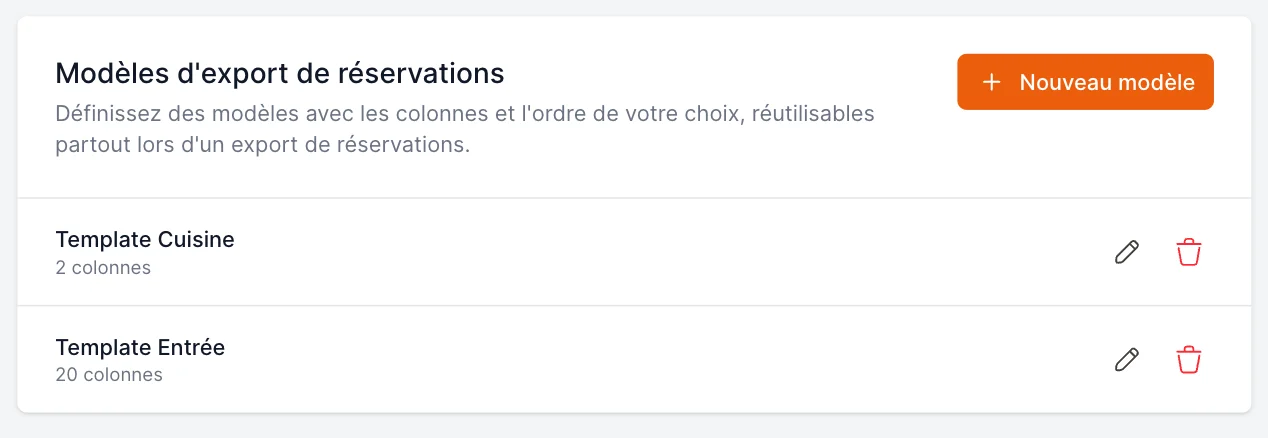
Click “New template”
A window opens with every column already selected — you start from the full list and trim it down.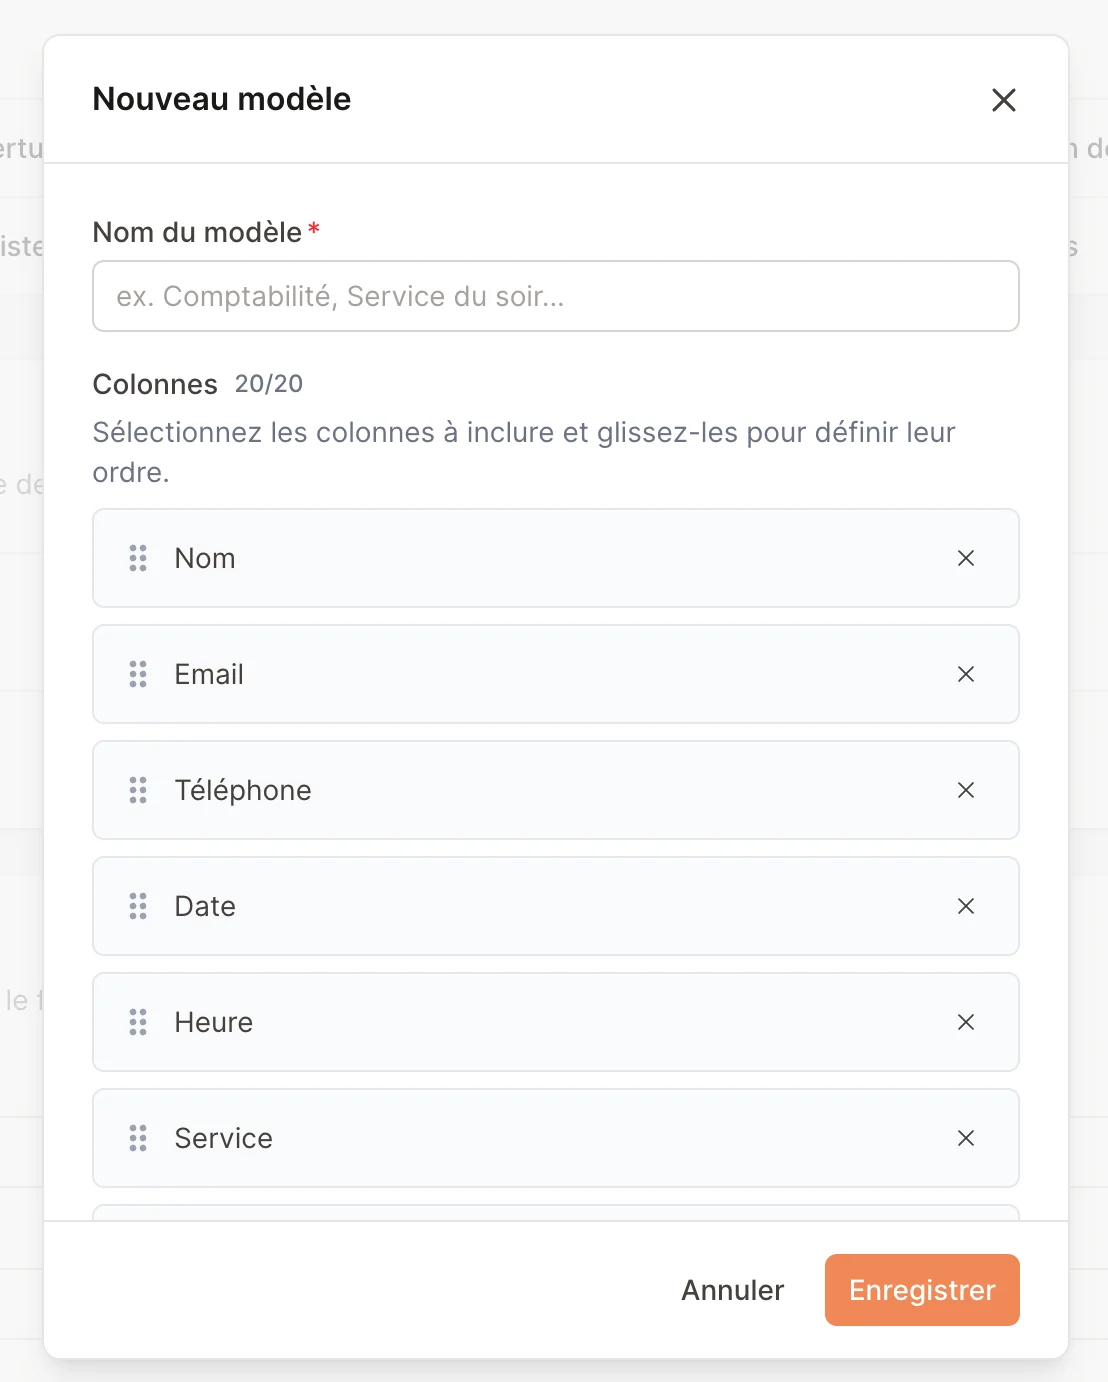
Pick and order your columns
- Remove a column with the ✕ on its right.
- Reorder columns by dragging them with the handle on the left — the order here is the order in your file.
- Add a column back with the Add a column button.
Export using a template
From a reservations view
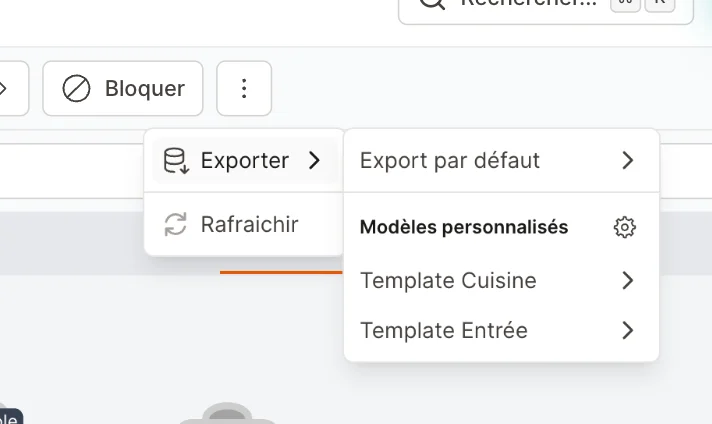
- Open the Export menu (top-right of the Reservations page).
- Choose Default export (all columns) or one of your saved templates under Custom templates.
- Pick CSV or XLSX — the download starts immediately.
From the settings page (by date range)
Use this to export a whole period at once:- Go to Settings → Integrations → Export.
- Pick an export template (or the default), a file format, and a start and end date.
- Click Export.
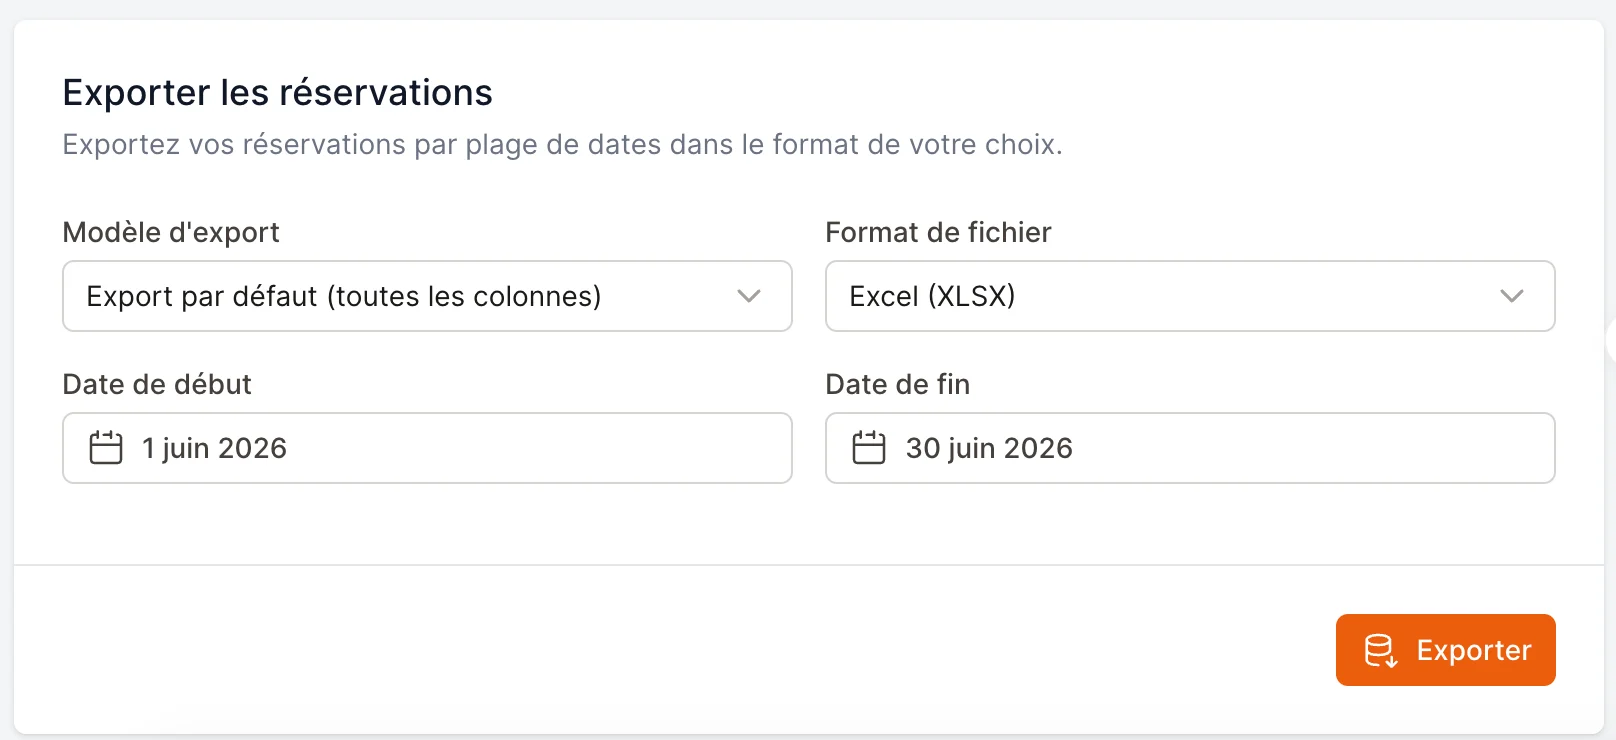
The date range filters by when the reservation was created, not the reservation’s service date.
Available columns
You can include any of these, plus your own custom fields: Name · Email · Phone number · Date · Time · Service · Group size · Status · Room · Tables · Payment type · Products (prepayment) · Deposit / Card hold · Payment status · Total paid · Pending amount · Prescriber · Allergies & comment · Internal note · AttachmentsFrequently asked
Where does the file go?
Where does the file go?
It downloads to your device like any other file — check your browser’s Downloads.
Do templates change my existing reservations?
Do templates change my existing reservations?
No. Templates only affect how exports look. They never modify your reservations.
Can my whole team use a template?
Can my whole team use a template?
Yes. Templates are saved for the restaurant, so everyone on your team sees and can use them.
My export is empty — why?
My export is empty — why?
When exporting from a view, the file contains only the reservations currently shown. Clear your filters or pick another date if you expected more.