
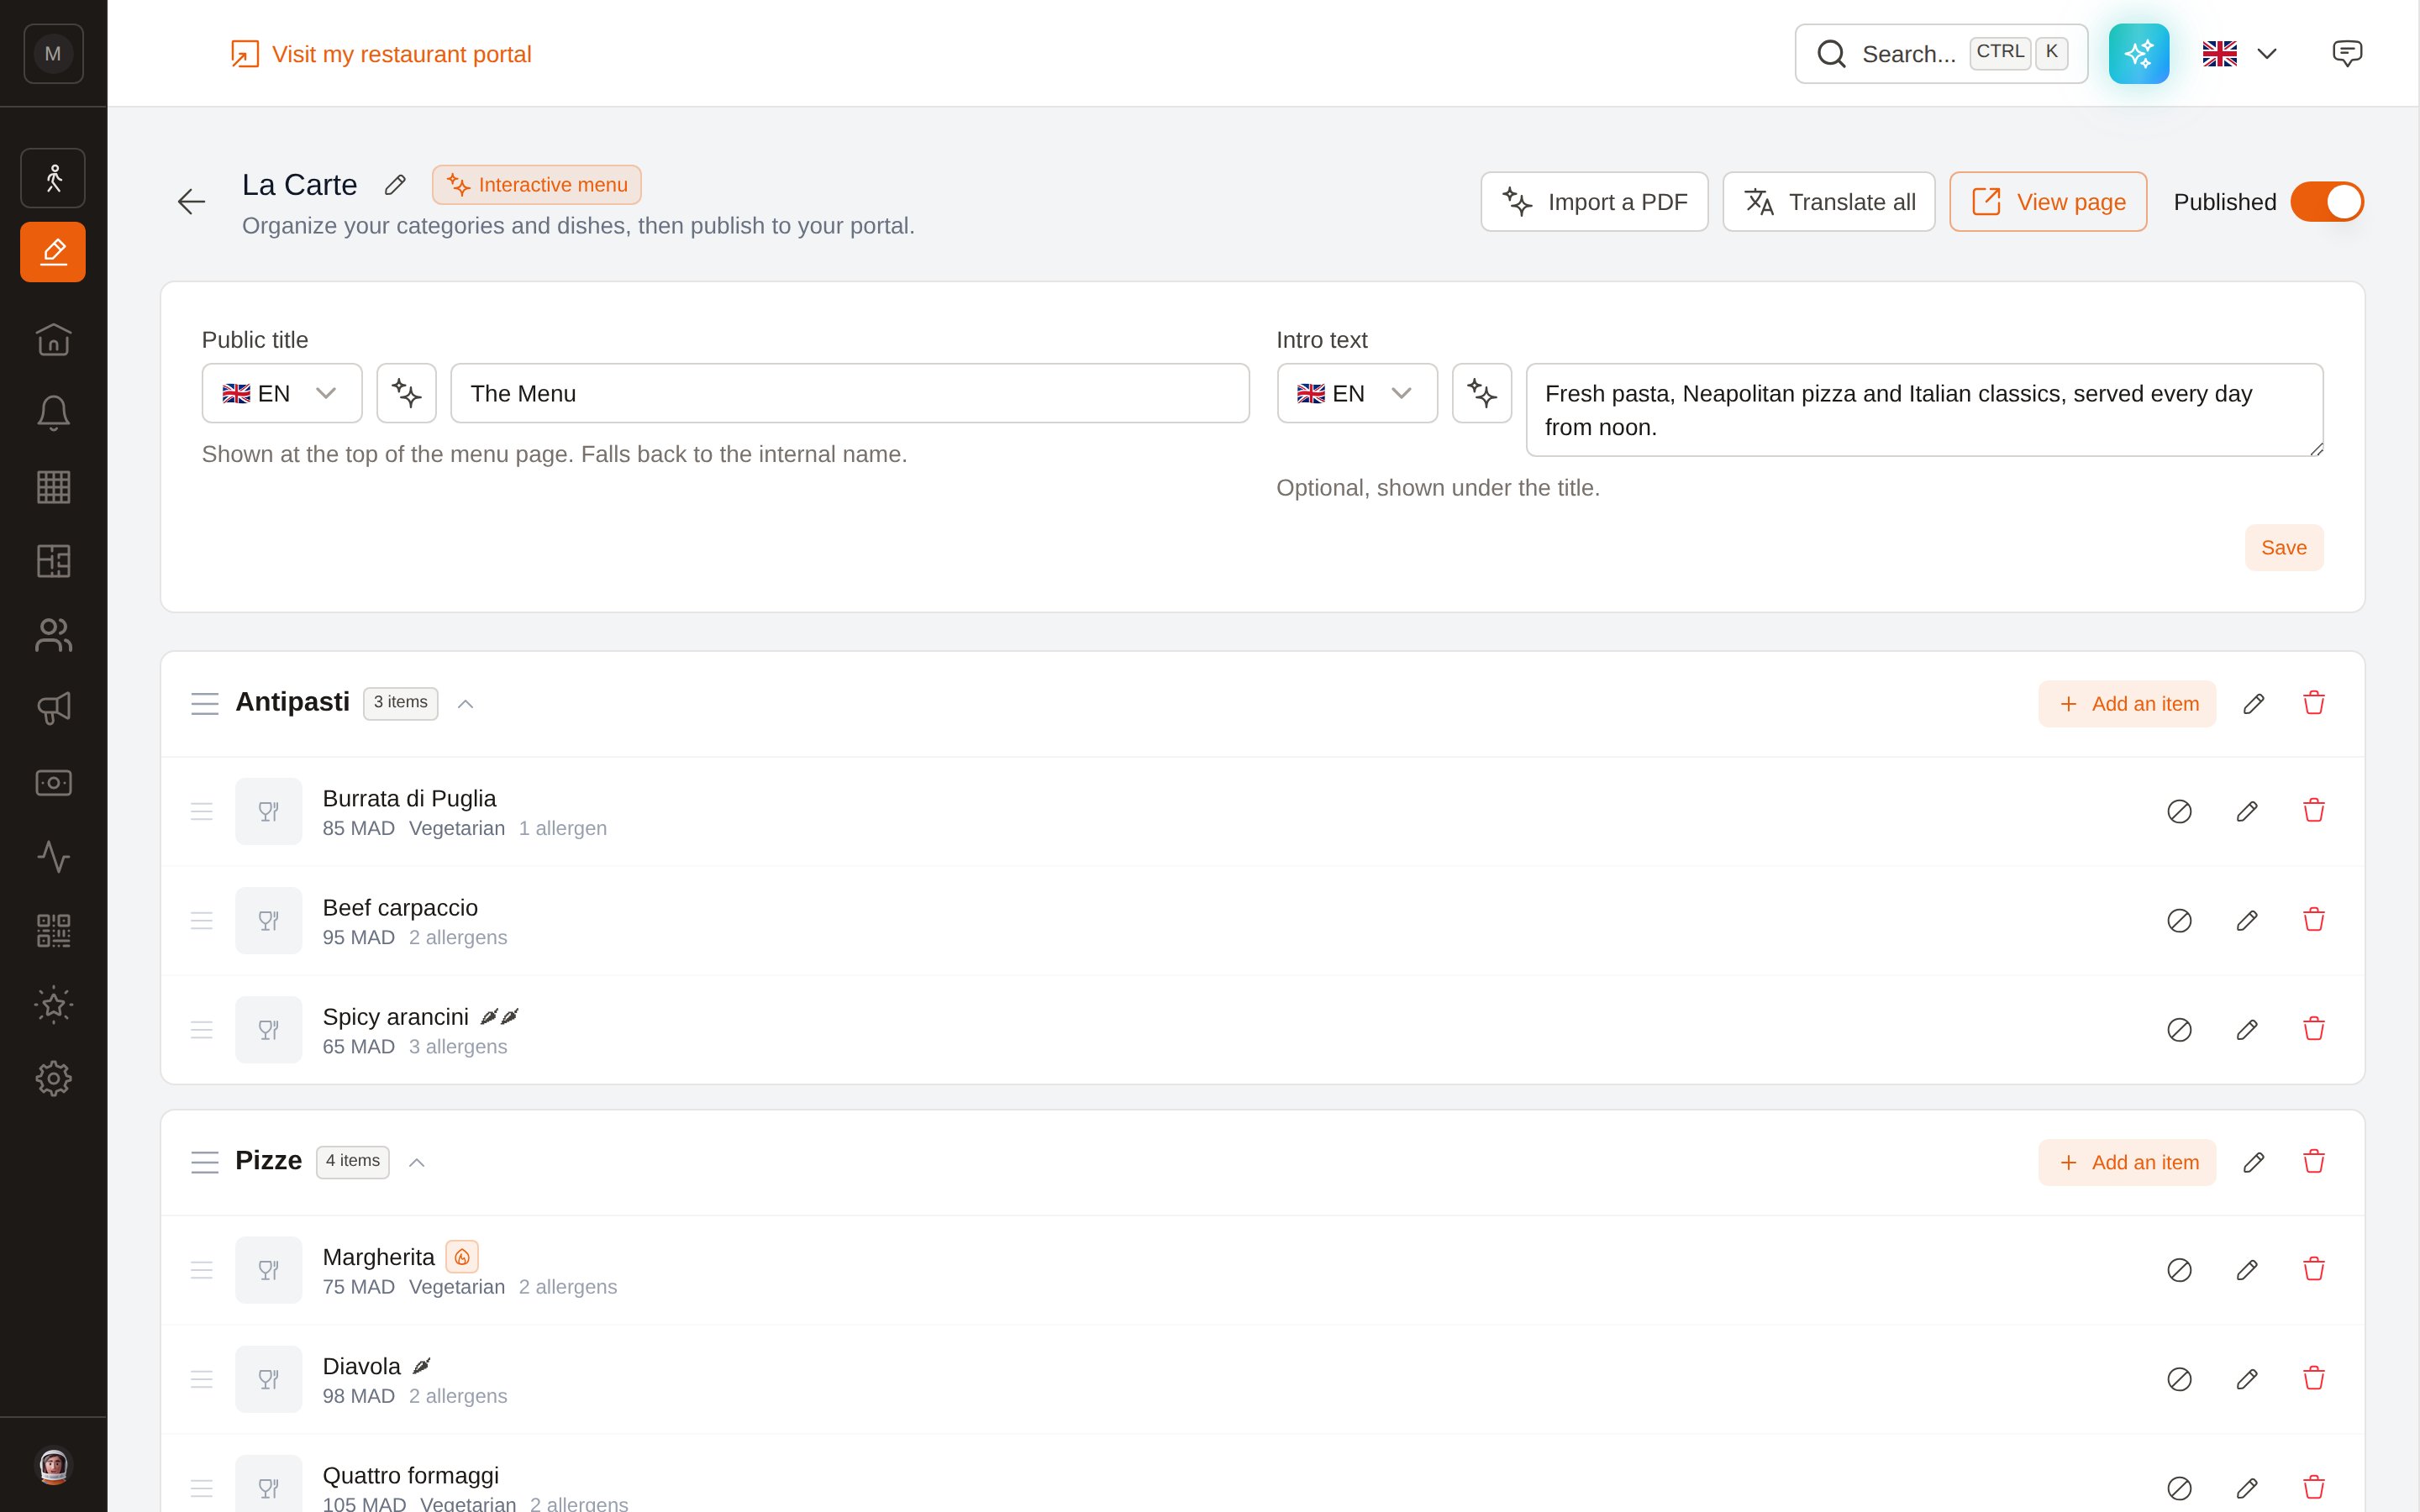
The editor: menu heading at the top, then your categories and dishes.
The menu heading
Click Save under those two fields to store them.
Categories
Categories are your menu sections: Starters, Mains, Desserts, Wines…- Add a category at the bottom of the editor.
- Reorder by dragging the handle on the left of a category. The order is saved instantly and is the order guests see.
- Rename or describe with the pencil. A category description shows as a short line under the section heading.
- Delete with the bin — this also deletes the dishes inside it.
Dishes
Use Add an item inside a category, or the pencil on an existing dish.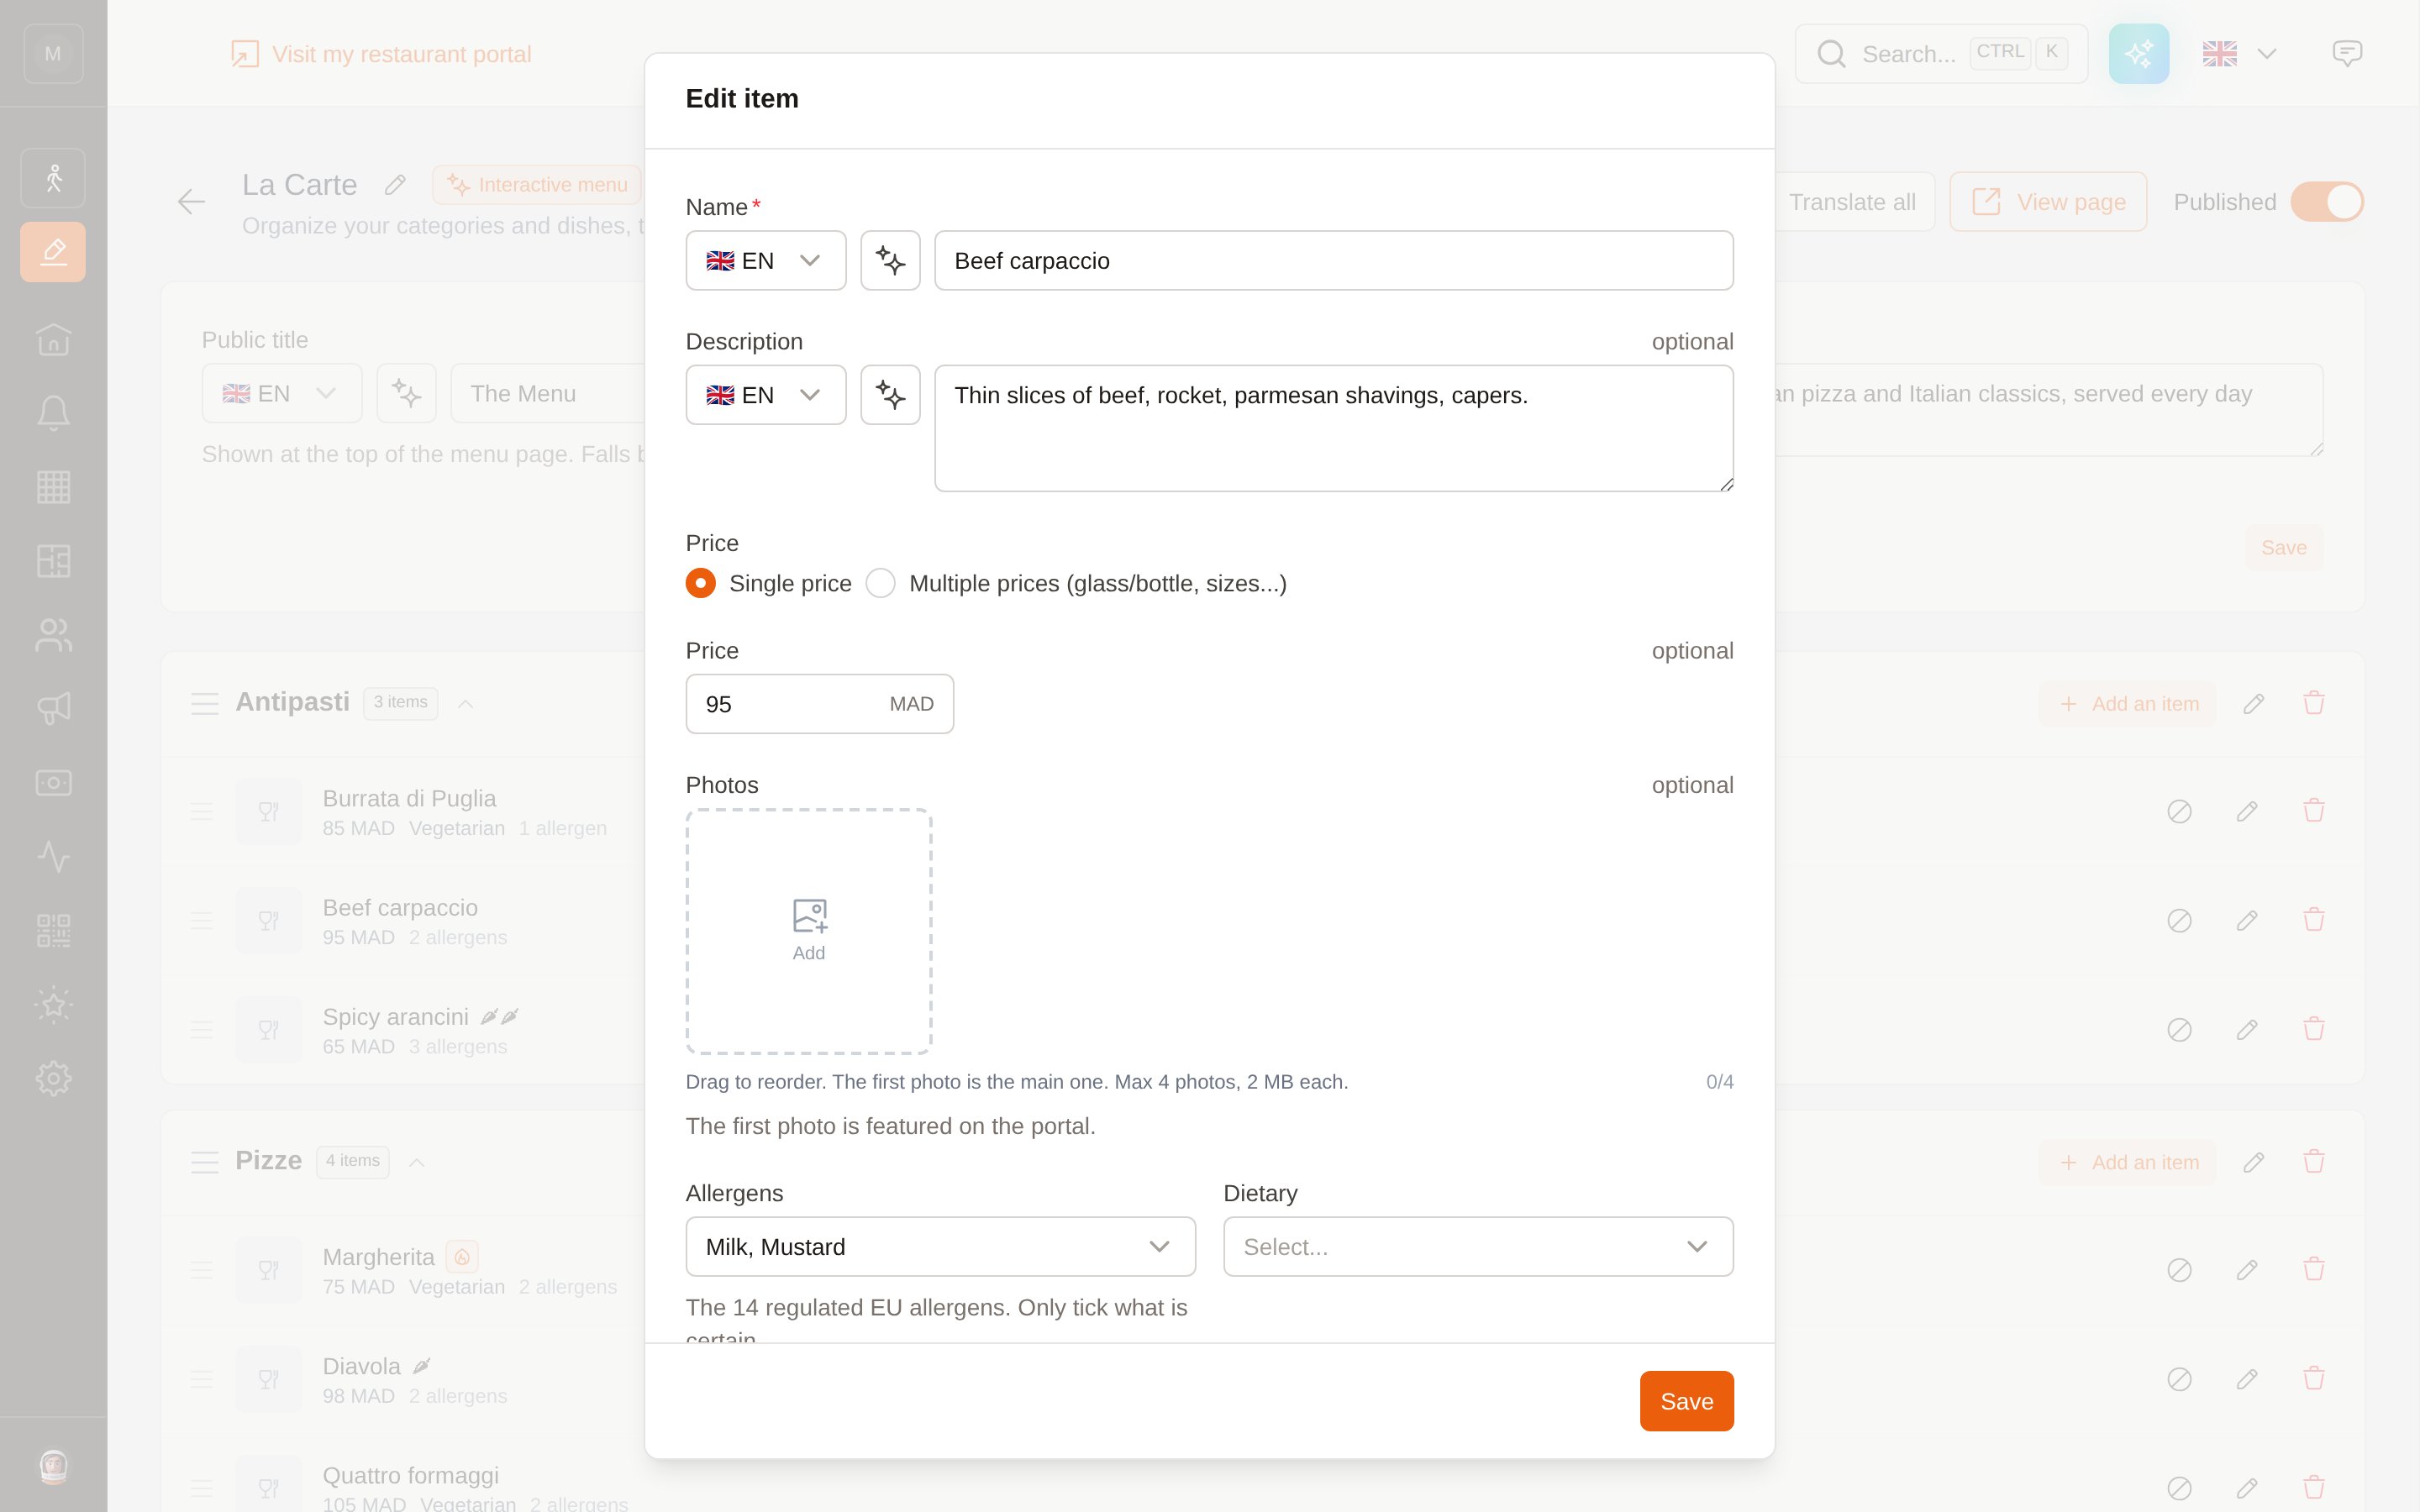
The top of the dish form: name, description and price.
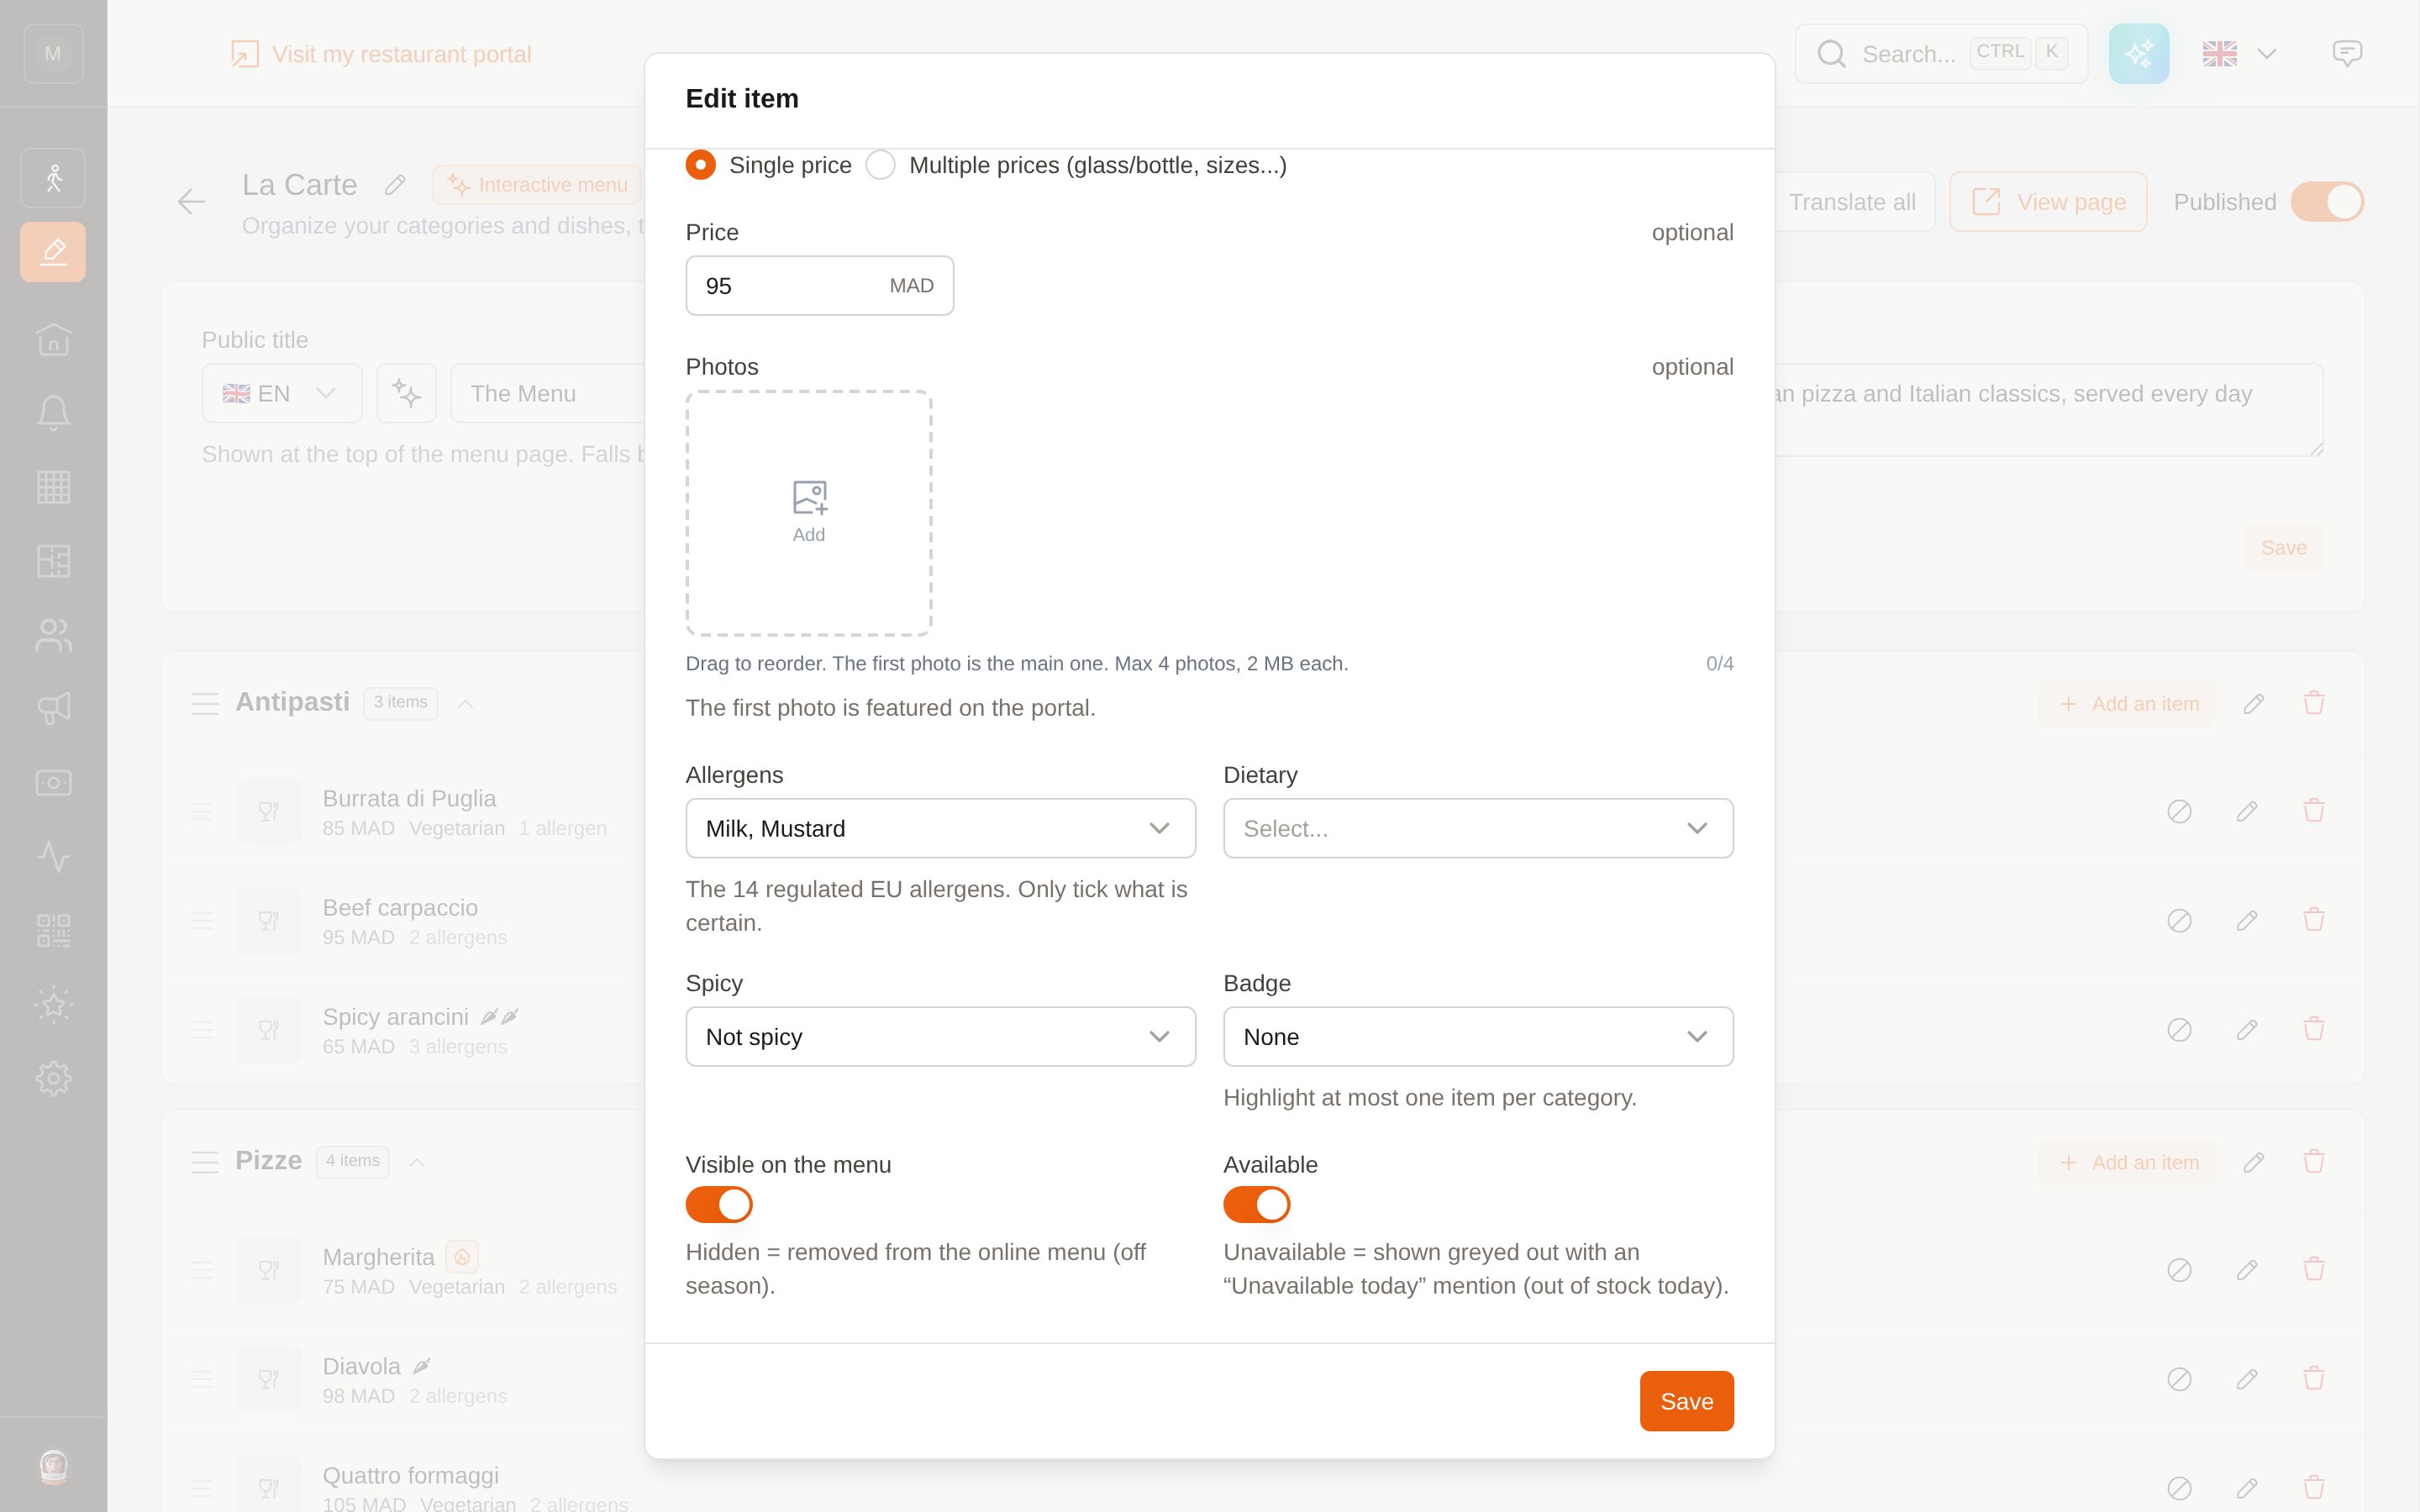
Allergens, dietary tags, badge and the two availability switches.
Out of stock vs. hidden
Two different switches, for two different situations:Available — off
You ran out tonight. The dish stays on the menu, greyed out and marked Unavailable today. Guests see the dish exists — just not right now. One tap on the ⊘ button in the dish row does the same thing without opening the form.
Visible on the menu — off
Off season, or not served any more. The dish disappears from the menu entirely, but stays in your editor so you can bring it back next season.
Translations
A menu imported from a PDF arrives already translated. The extraction translates your menu into the portal’s six languages — English, French, Spanish, German, Portuguese, Italian — before it even shows it to you. There is nothing to run. For dishes you add or edit afterwards, every text field has a language selector and a ✨ button. For the whole menu at once, Translate all in the toolbar is still there: use it if the extraction couldn’t translate, or after adding a lot of dishes by hand.A dish no translation covers is never shown blank to your guests: the public page falls back to the language it is written in.
Re-import a PDF
Your printed menu changed? Click Import a PDF in the toolbar at any time. You choose what happens to the current content:- Replace current content — on: the existing categories and dishes are deleted, then the extracted ones are created. Use this for a new season’s menu.
- Replace current content — off: the extracted content is added after what’s already there. Use this to add a wine list to an existing food menu.
Publish
The Published switch at the top right is what makes the menu visible to your guests. It is the same thing as the Visible switch on the menus list. While a menu is unpublished, an orange banner reminds you, and the page simply does not exist for the outside world. Before you flip the switch, a quick checklist:- Every dish re-read, especially allergens
- Prices match your printed menu
- Categories in the order you want
- Translate all run at least once
- A Public title set (or the internal name is fine as a title)