> ## Documentation Index
> Fetch the complete documentation index at: https://docs.eat-now.io/llms.txt
> Use this file to discover all available pages before exploring further.
# Enable WhatsApp Notifications
> Choose which automatic messages EatNow sends your customers on WhatsApp.
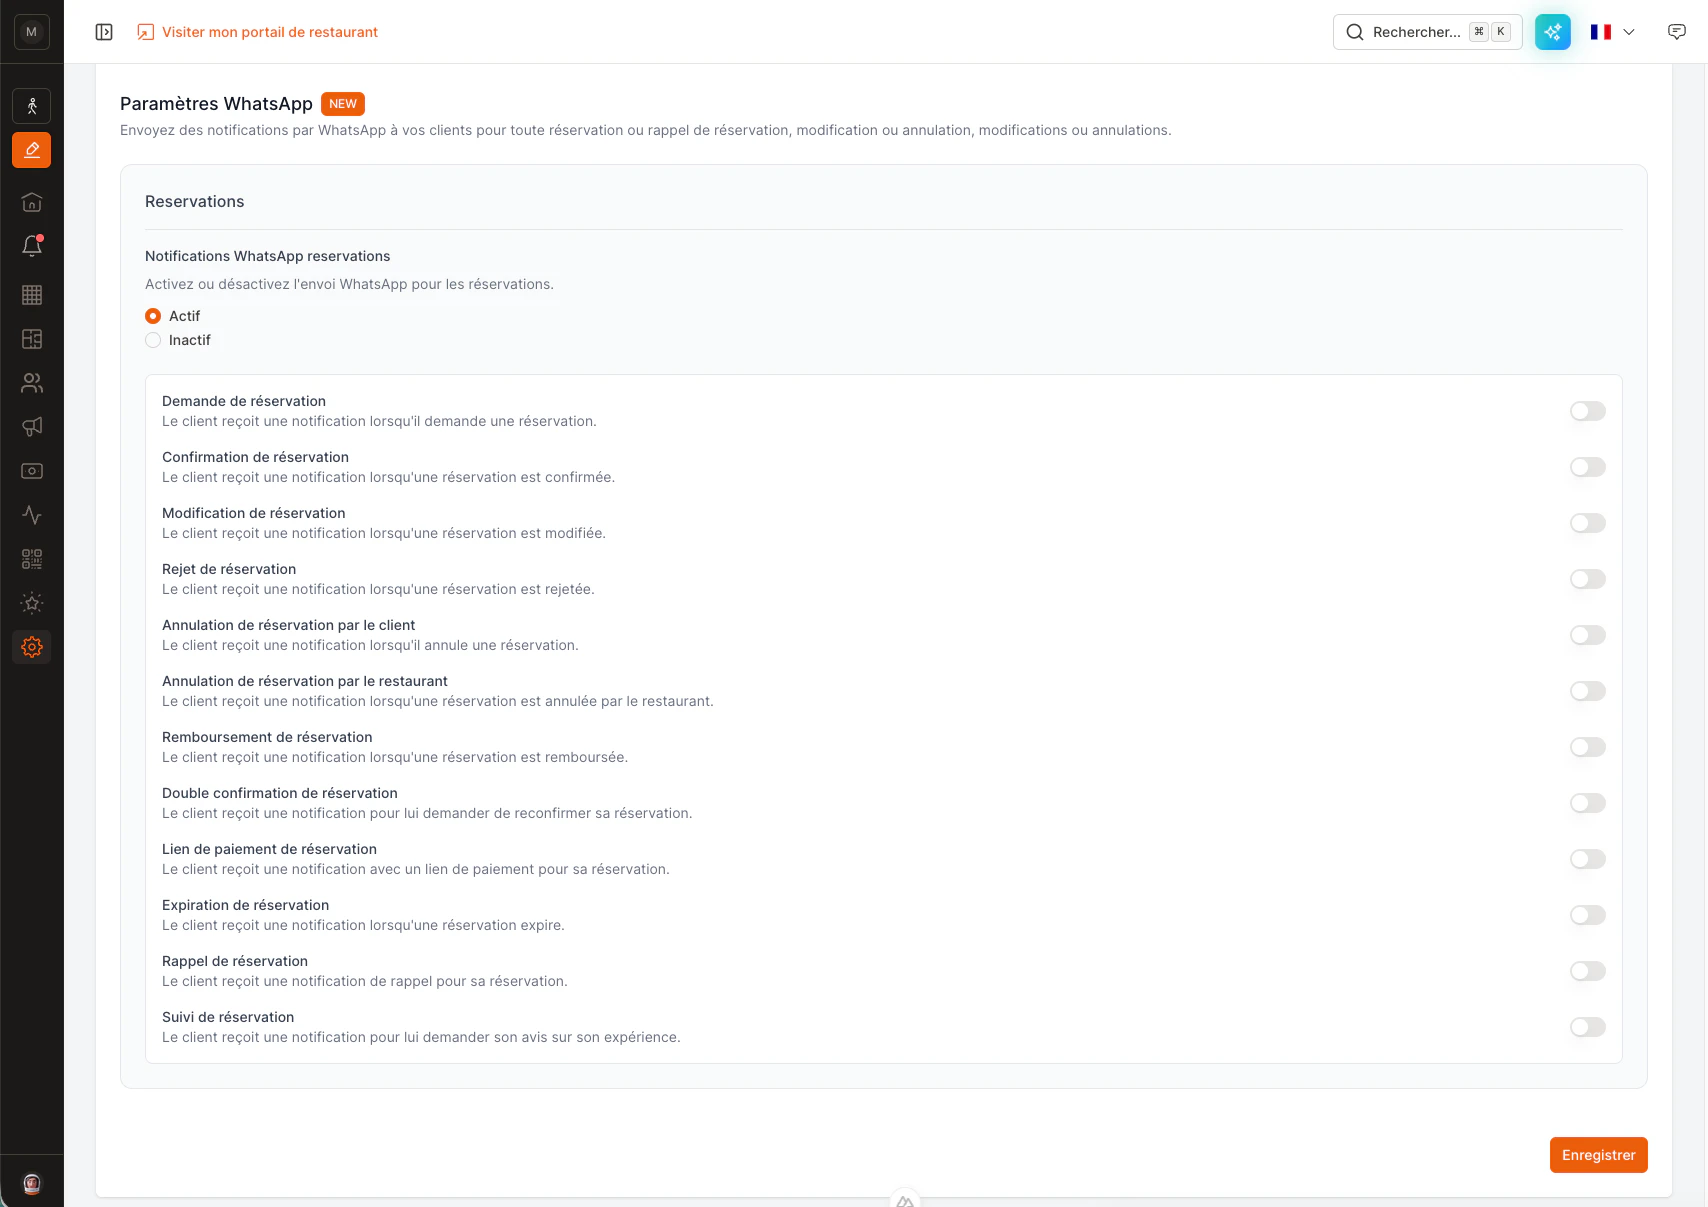 Once WhatsApp is connected, turn on the **automatic notifications** EatNow sends on your behalf — booking confirmations, reminders, and so on. Receiving messages and replying from the inbox always work; this page is about the messages EatNow sends **automatically**.
In **EatNow**, go to **Settings → Notifications → General**.
At the bottom of the page, open the **WhatsApp settings** section.
Turn them on — **advanced mode** opens so you can pick exactly which notifications go out. Sending fewer types helps keep costs down.
Click **Save**. Your customers will now receive the chosen notifications on WhatsApp.
Automatic messages only go out once your setup is complete — see [Verify your business](/whatsapp/verification) (an approved display name and a payment method on file with Meta). Until then, you can still chat and reply from the inbox.
Once WhatsApp is connected, turn on the **automatic notifications** EatNow sends on your behalf — booking confirmations, reminders, and so on. Receiving messages and replying from the inbox always work; this page is about the messages EatNow sends **automatically**.
In **EatNow**, go to **Settings → Notifications → General**.
At the bottom of the page, open the **WhatsApp settings** section.
Turn them on — **advanced mode** opens so you can pick exactly which notifications go out. Sending fewer types helps keep costs down.
Click **Save**. Your customers will now receive the chosen notifications on WhatsApp.
Automatic messages only go out once your setup is complete — see [Verify your business](/whatsapp/verification) (an approved display name and a payment method on file with Meta). Until then, you can still chat and reply from the inbox.