> ## Documentation Index
> Fetch the complete documentation index at: https://docs.eat-now.io/llms.txt
> Use this file to discover all available pages before exploring further.
# QR codes & sharing
> Print a QR code for your tables, share the link, and see exactly what your guests get — filters, languages, and how Google reads your menu.
Every menu — PDF or interactive — has a **permanent public link** and a **QR code**. They never change, so a QR code you printed last year still works today.
## Get the link and the QR code
From **Digital menus**, click the **QR code** icon on the menu's row.
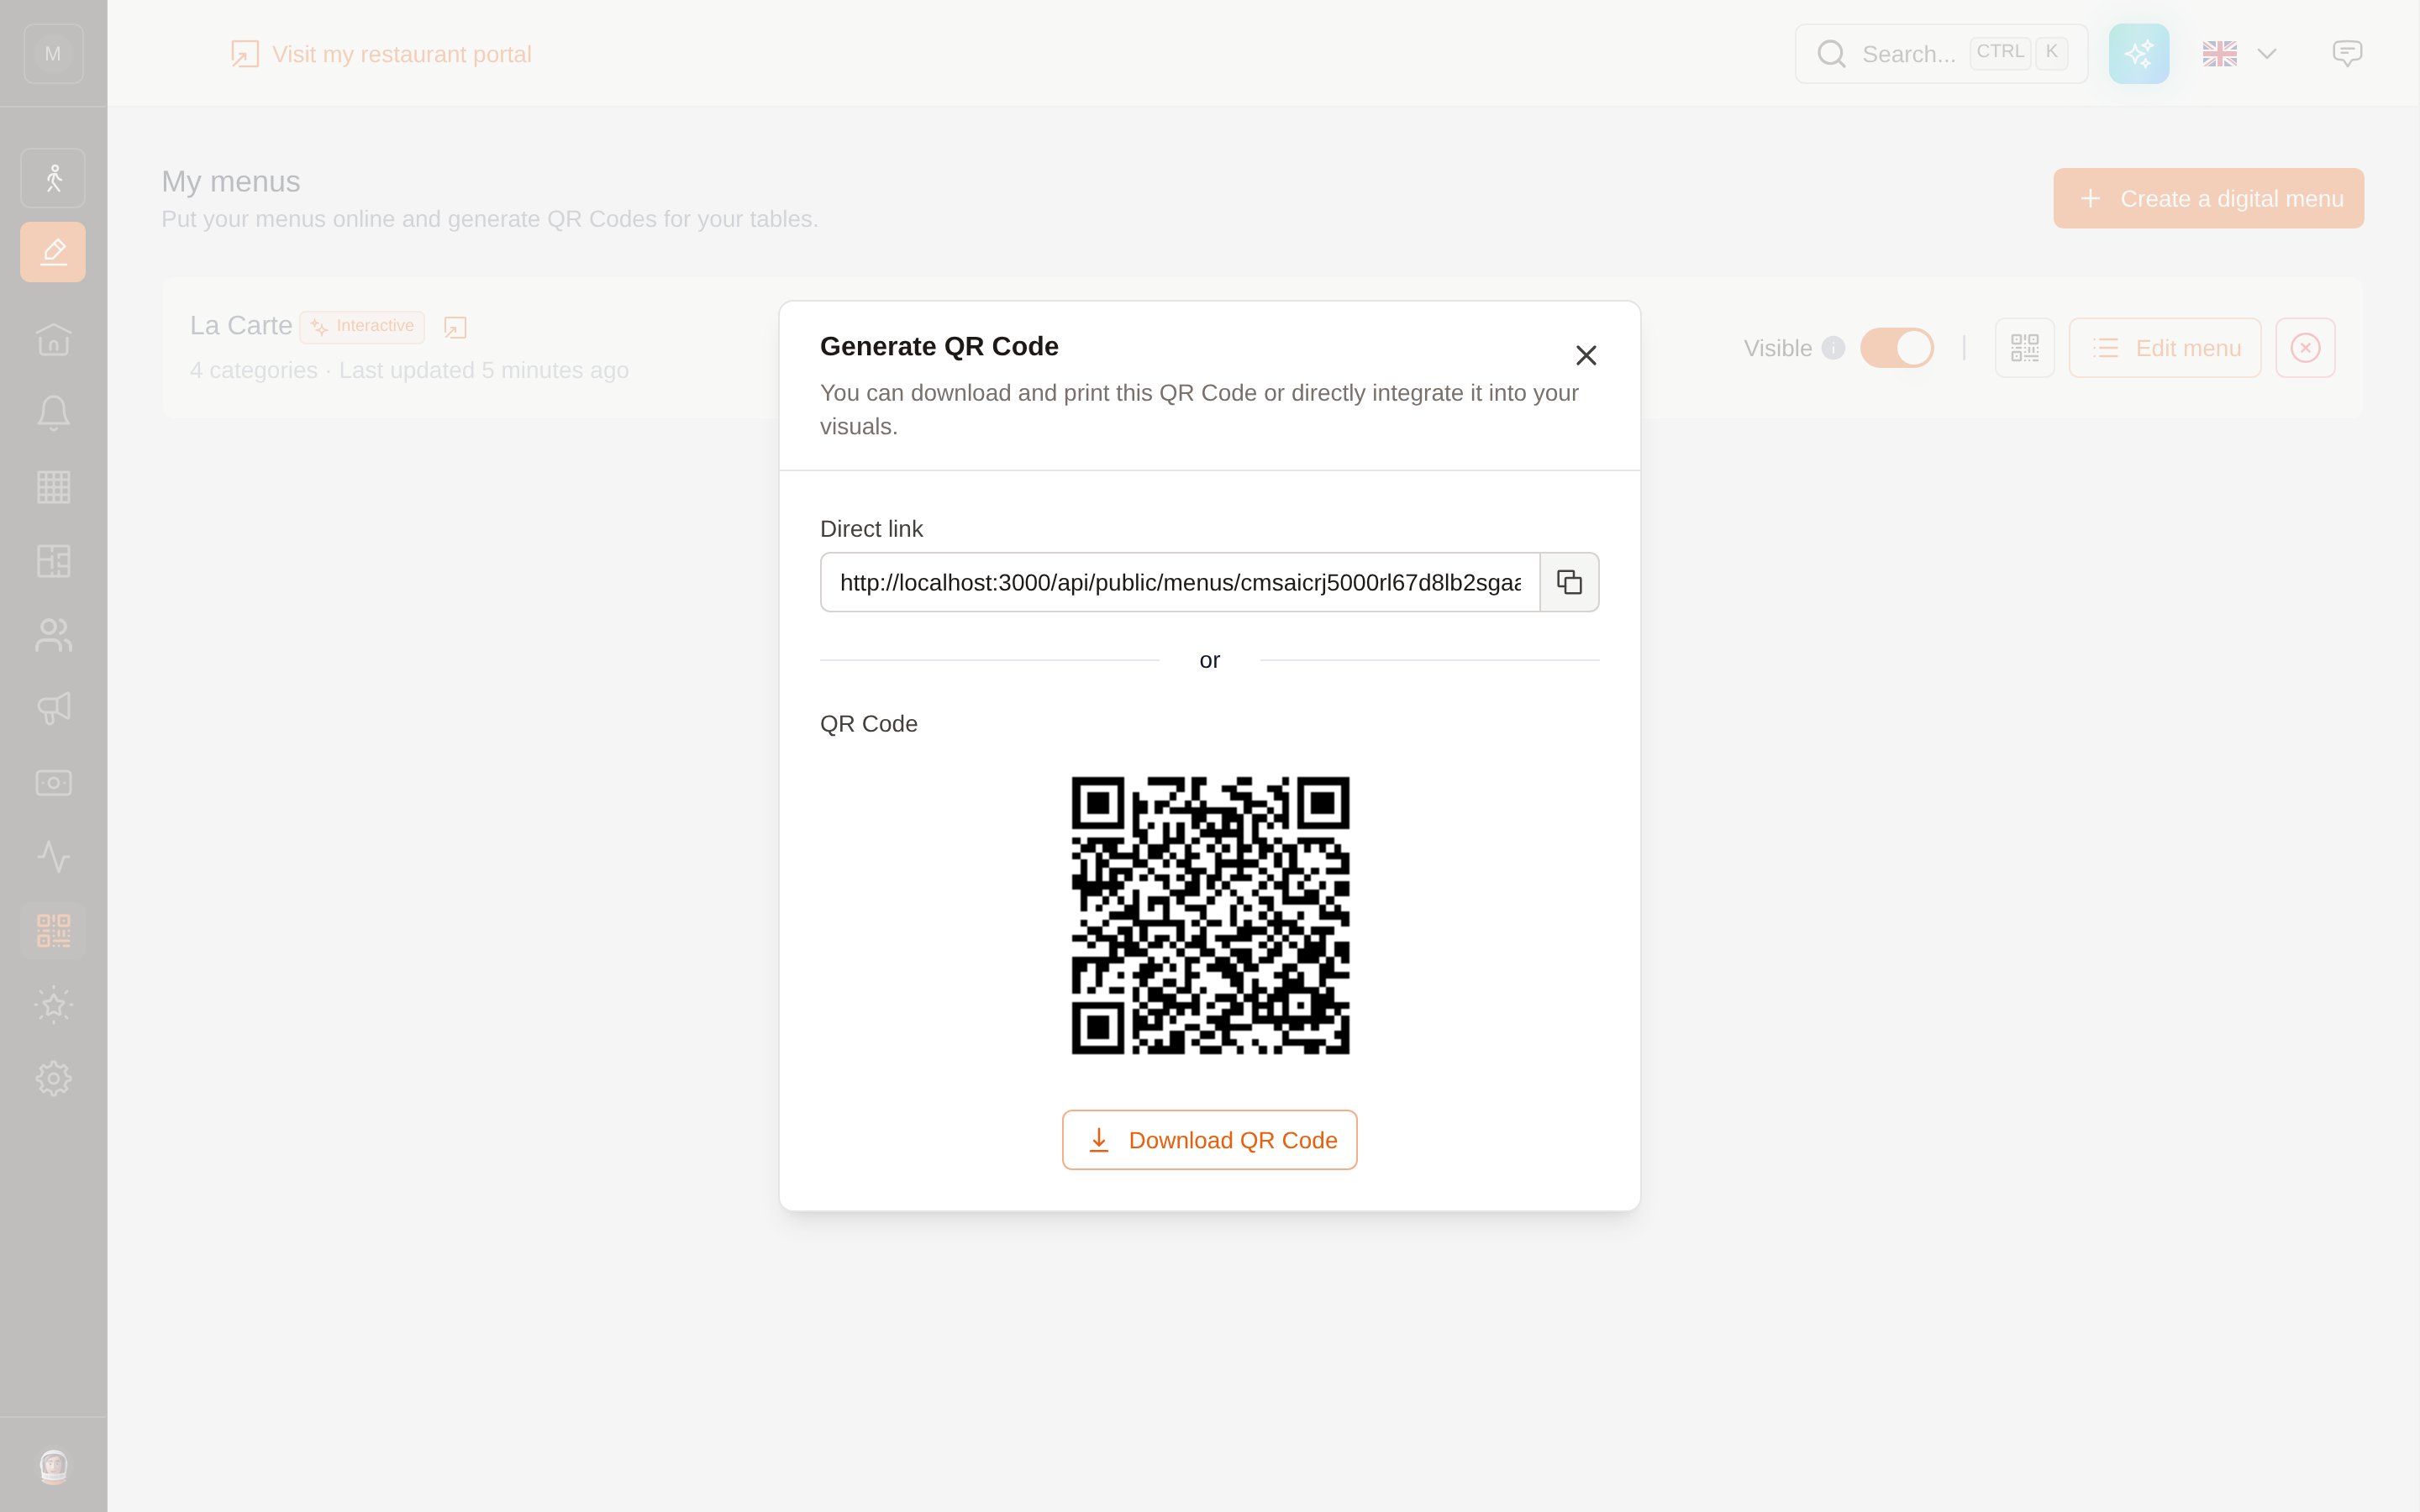 * **Direct link** — copy it with the button next to it. Put it on your website, in your Instagram bio, in an email or a WhatsApp reply.
* **QR code** — click **Download QR Code** to get a PNG. Print it on table tents, on your window, at the bottom of the bill.
The QR code and the link are deliberately slightly different. A QR code is normally scanned **at the table**, so the page it opens hides the *Book a table* button — your guest is already seated. The copied link keeps the booking button, because it's meant for people who are not there yet.
## Where guests find it on your portal
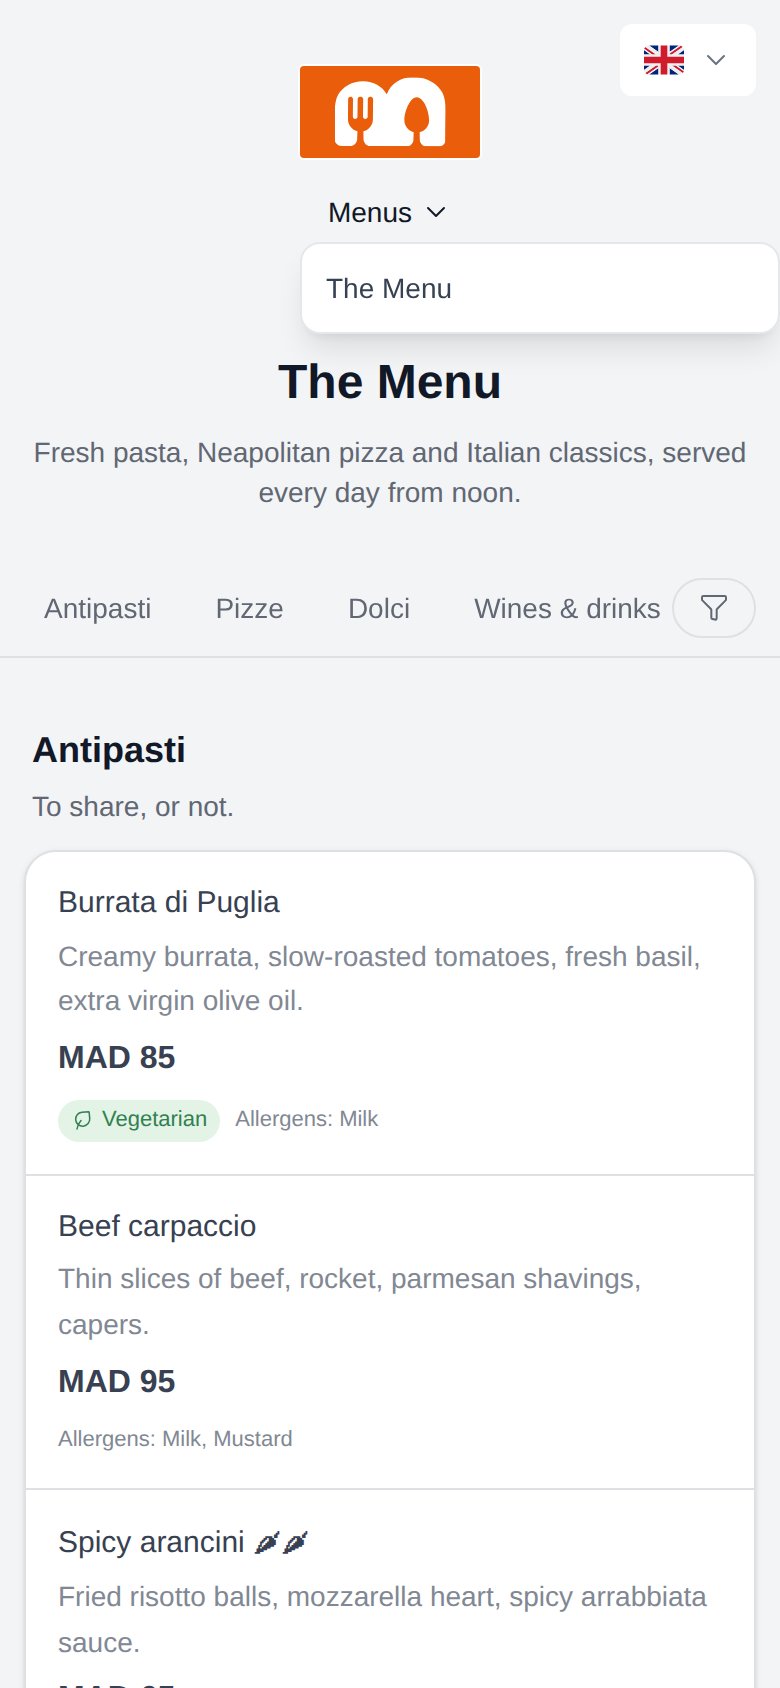
As soon as one menu is visible, a **Menus** link appears in the header of your booking portal. If you have several, it opens a small dropdown listing them.
* **Direct link** — copy it with the button next to it. Put it on your website, in your Instagram bio, in an email or a WhatsApp reply.
* **QR code** — click **Download QR Code** to get a PNG. Print it on table tents, on your window, at the bottom of the bill.
The QR code and the link are deliberately slightly different. A QR code is normally scanned **at the table**, so the page it opens hides the *Book a table* button — your guest is already seated. The copied link keeps the booking button, because it's meant for people who are not there yet.
## Where guests find it on your portal
As soon as one menu is visible, a **Menus** link appears in the header of your booking portal. If you have several, it opens a small dropdown listing them.
 You can rename or reorder that link — and the other portal links — in **Settings → Portal → Links**.
## What your guests see
A PDF menu simply opens your file. An **interactive menu** opens a page like this one:
You can rename or reorder that link — and the other portal links — in **Settings → Portal → Links**.
## What your guests see
A PDF menu simply opens your file. An **interactive menu** opens a page like this one:
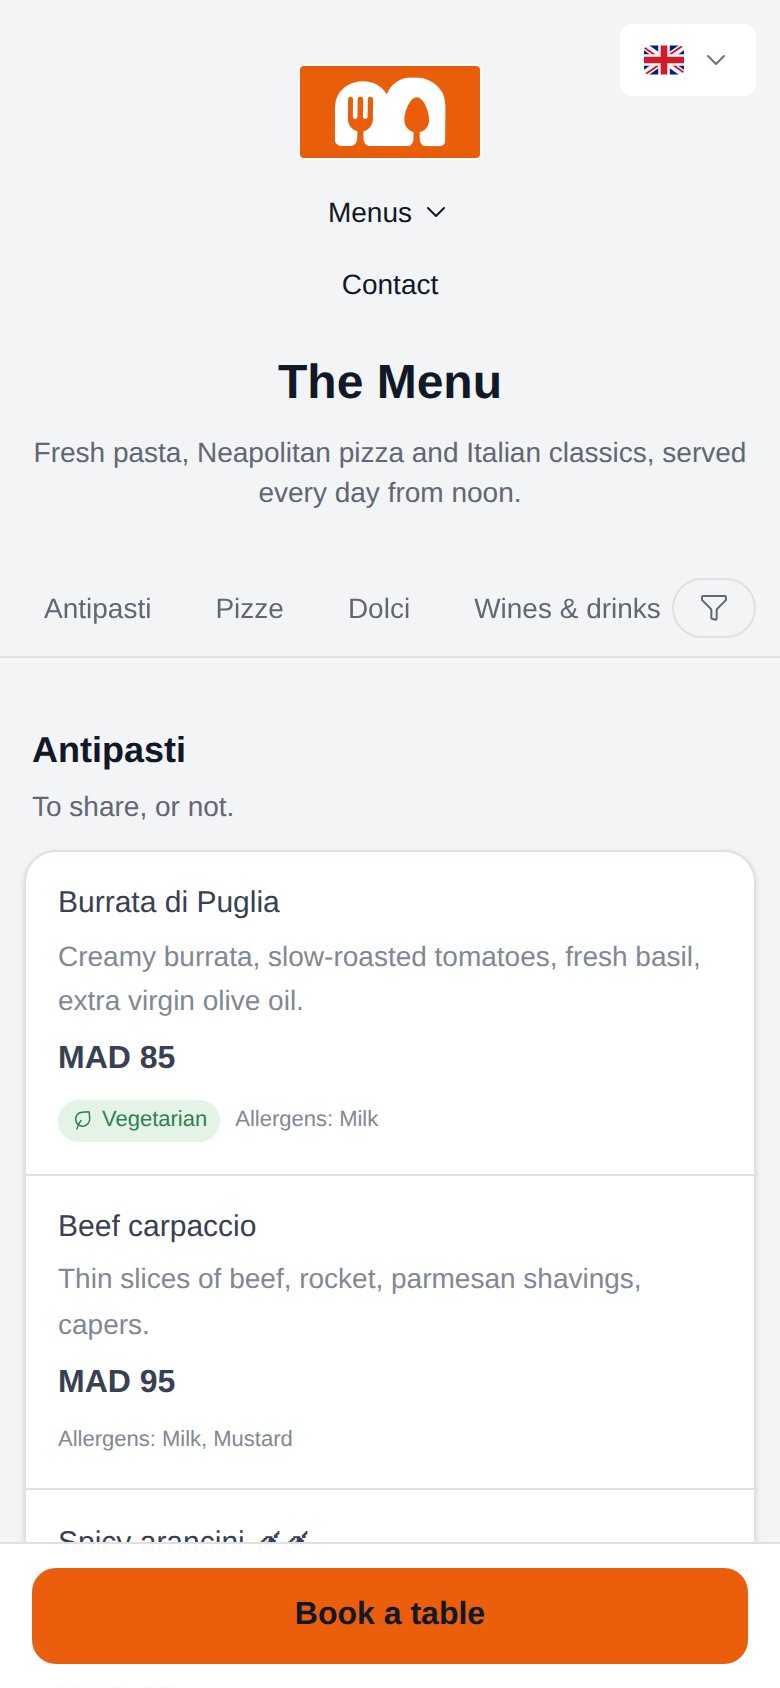 * **Category tabs** stick to the top while they scroll, and follow the section they're reading.
* **Prices, photos, dietary chips and allergens** on every dish; tapping a dish opens its full details and photo.
* **Badges and chili levels** stand out — a good reason to use them sparingly.
* A dish you marked out of stock stays visible, greyed out, labelled **Unavailable today**.
* **Category tabs** stick to the top while they scroll, and follow the section they're reading.
* **Prices, photos, dietary chips and allergens** on every dish; tapping a dish opens its full details and photo.
* **Badges and chili levels** stand out — a good reason to use them sparingly.
* A dish you marked out of stock stays visible, greyed out, labelled **Unavailable today**.
 ### Filters
Behind the **Filters** button, guests can pick dietary preferences and exclude allergens.
### Filters
Behind the **Filters** button, guests can pick dietary preferences and exclude allergens.
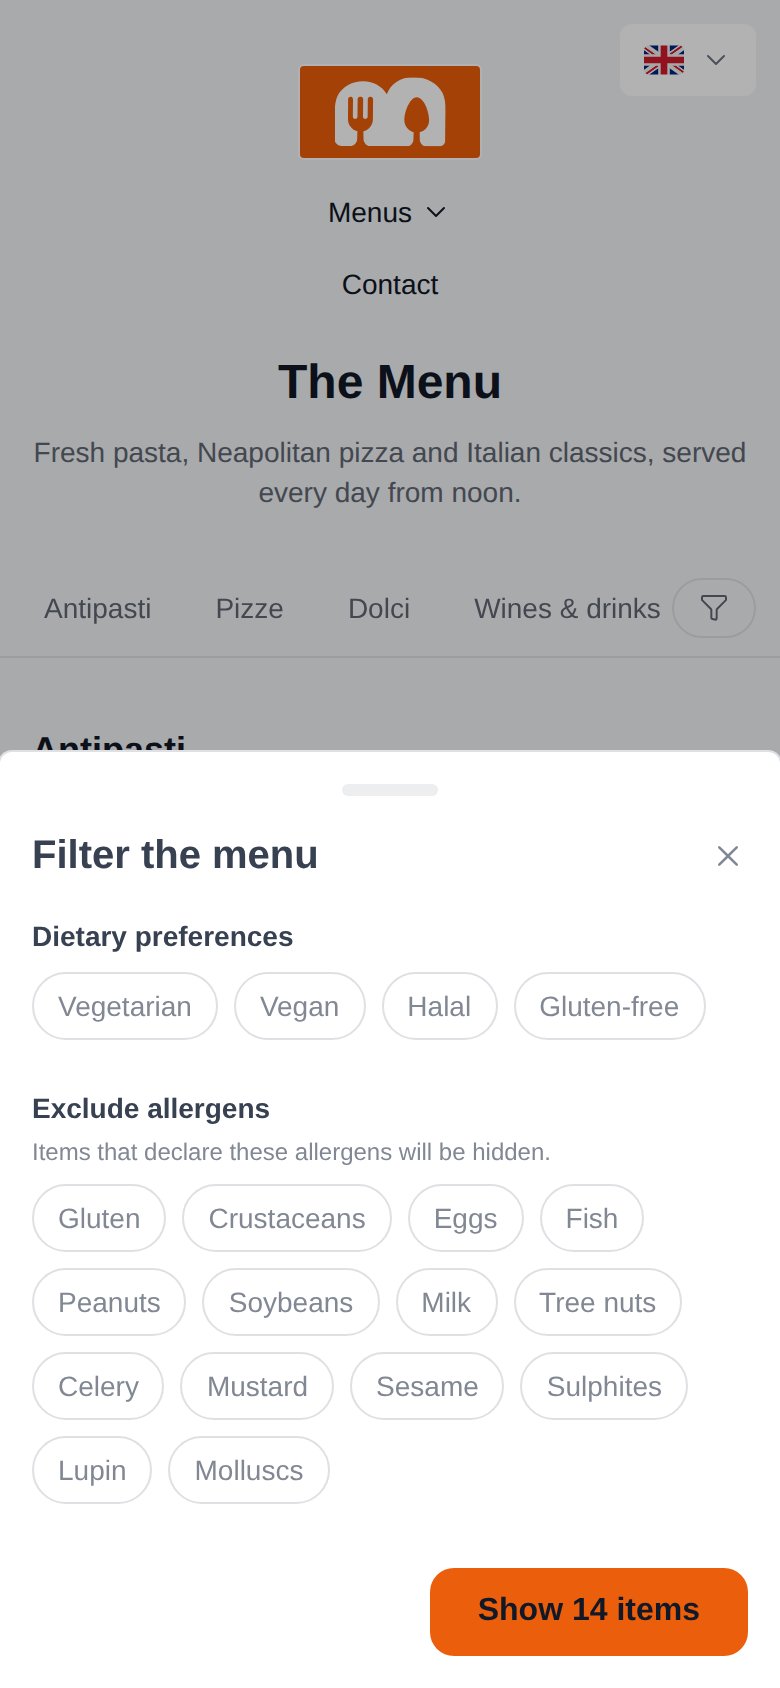 * **Dietary preferences** keep only the dishes that carry *all* the selected tags.
* **Exclude allergens** hides the dishes that **declare** the excluded allergen.
The allergen filter can only work with what you entered. A dish with no allergen filled in is never hidden — it simply declares nothing. The page carries a disclaimer inviting guests to tell your team about any allergy, but that does not replace an accurate menu.
### Languages
The page follows the guest's language, and they can switch it from the flag at the top right. Six languages are available: English, French, Spanish, German, Portuguese, Italian — filled automatically when your PDF is imported.
A dish no translation covers — a recent addition, say — shows in the language you wrote it in rather than leaving a blank on the page.
## Google and AI assistants
An interactive menu is a real web page, rendered on the server, so:
* **Google can index it** — your dishes and prices become searchable, which a PDF never allows.
* It embeds **schema.org structured data** (`Restaurant → hasMenu → MenuSection → MenuItem`, with prices and diets), the format search engines and AI assistants read to answer questions like *"vegan pizza near me"*.
Nothing to configure — it happens as soon as the menu is published.
* **Dietary preferences** keep only the dishes that carry *all* the selected tags.
* **Exclude allergens** hides the dishes that **declare** the excluded allergen.
The allergen filter can only work with what you entered. A dish with no allergen filled in is never hidden — it simply declares nothing. The page carries a disclaimer inviting guests to tell your team about any allergy, but that does not replace an accurate menu.
### Languages
The page follows the guest's language, and they can switch it from the flag at the top right. Six languages are available: English, French, Spanish, German, Portuguese, Italian — filled automatically when your PDF is imported.
A dish no translation covers — a recent addition, say — shows in the language you wrote it in rather than leaving a blank on the page.
## Google and AI assistants
An interactive menu is a real web page, rendered on the server, so:
* **Google can index it** — your dishes and prices become searchable, which a PDF never allows.
* It embeds **schema.org structured data** (`Restaurant → hasMenu → MenuSection → MenuItem`, with prices and diets), the format search engines and AI assistants read to answer questions like *"vegan pizza near me"*.
Nothing to configure — it happens as soon as the menu is published.